


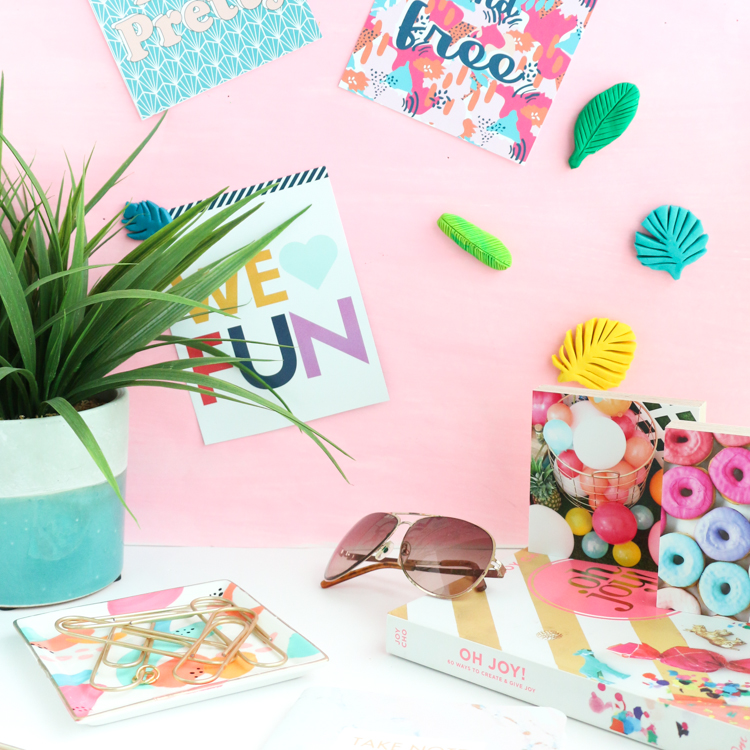
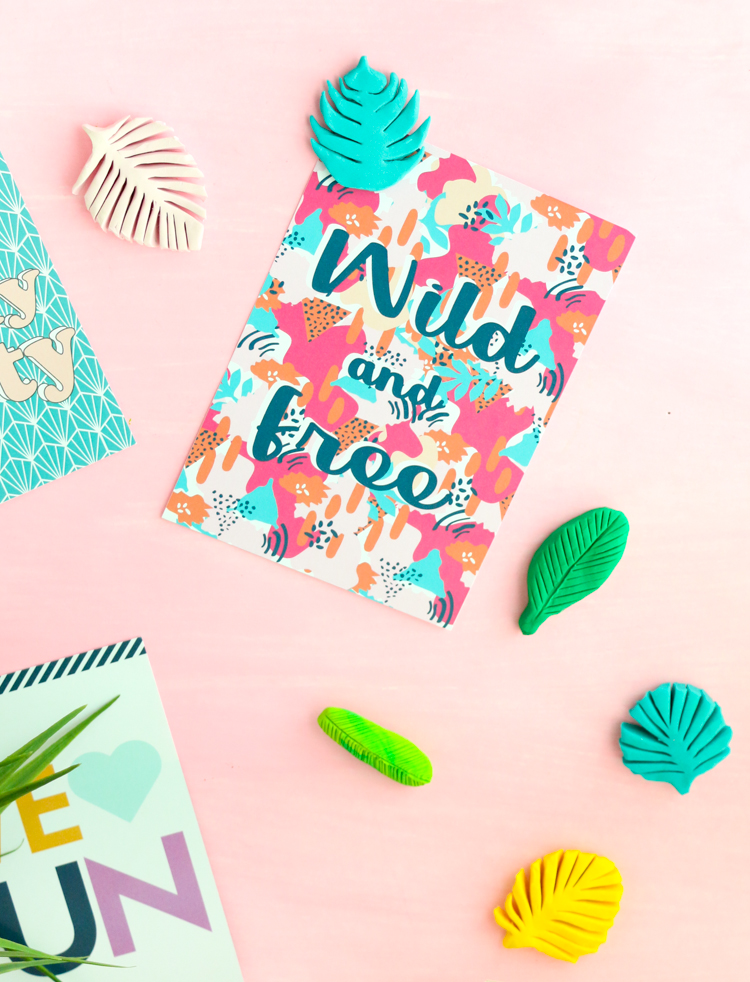
It’s that time of the year when you are still hanging on to summer, but also looking forward to fall, pumpkins, and cooler weather. Or is that just me? I originally made these palm leaf push pins for the Consumer Crafts blog, Crafts Unleashed, but they were just too cute not to share with you too. A fun way to hang on to summer while still bringing out all the pumpkins!
Supplies:
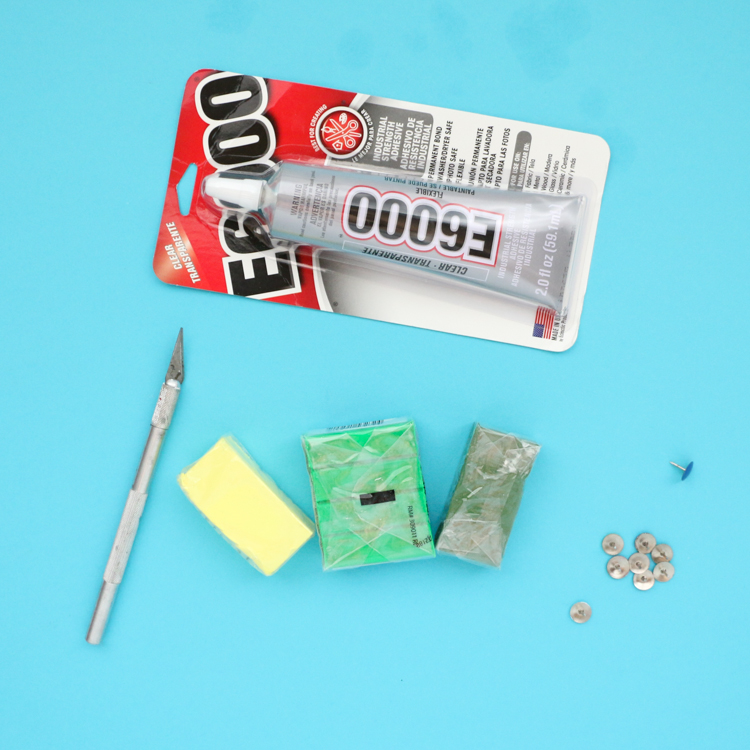
- Clay Rolling Pin
- Flat Backed Push Pins
- Oven and Oven Safe Baking Sheet
Begin by rolling out your clay into 1/4″ thick sheets. Then use the X-acto knife to cut the clay into leaf shapes (I made both palm leaf and banana leaf shapes).
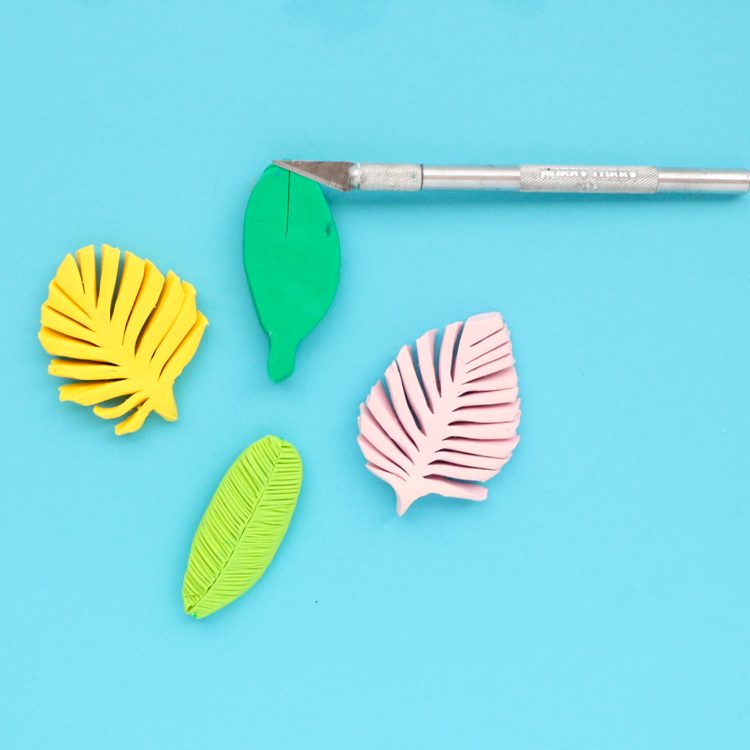
Once you have your leaf shapes cut, use the knife to cut into the clay to create many little leaf pieces on each side. For the banana leaf, score a line down the middle of the leaf and then imprint delicate lines at angles up each side. Once all your leaves are cut, it’s time to bake your clay.
Flip your baking sheet over to use the underside and lay all your pieces out on the sheet. Bake in a 275F oven for 20 minutes, then let cool.
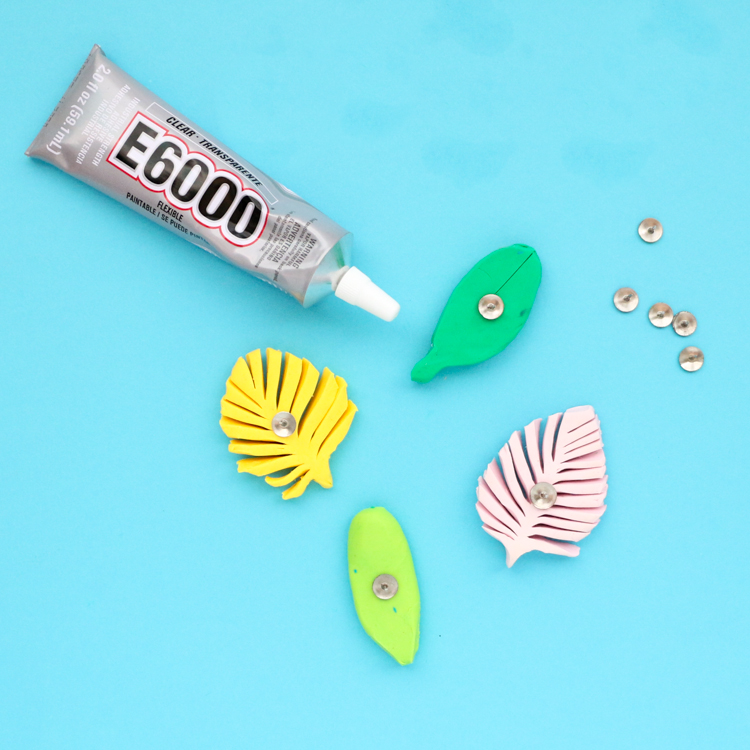
Once cool, use the E6000 (in a well ventilated space) to attach the palm leaf shapes to the push pins. Let the glue set up overnight and then your DIY push pins are ready to hold up all those important memo’s, pictures, and pieces of artwork.

Not only are they super cute and a snap to make, but these palm leaf push pins are going to keep the summer feeling going long into fall. And I’m totally okay with that!


