


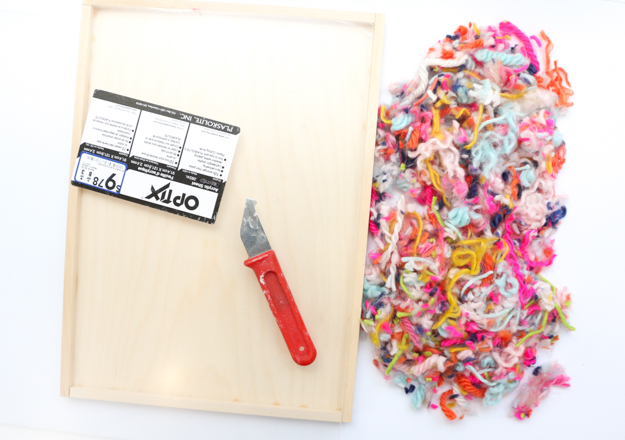
The Supplies (all except the yarn can be found at any home improvement store):
- 1/2″ birch plywood cut to your desired size (I went with 12″ by 16″, you can have the home improvement store cut this for you)
- 3/8″ square wood dowels (I needed around 56″ for my 12″ by 16″ tray)
- Clear Acrylic plexiglass
- Plexiglass cutter
- Wood Glue
- Yarn Trimmings and scraps (or just make yarn pieces by cutting and shredding colorful yarn)
- Clear Silicone Sealant
Begin by measuring your plywood piece and marking your dowels so that they fit on top of your tray and form a ledge around the outside edge of your tray. Then use a miter saw or hand saw and miter box to cut the dowels to size.

Once cut, use the wood glue to glue the square dowels around the edge of the plywood to create a raised edge. Let the wood glue dry overnight.
Once the glue is dry, measure the inside dimensions of your tray and mark your plexiglass with these dimensions. Use a ruler and the plexiglass cutter to score the plexiglass deeply on each side where you need it to be cut, and then bend it to snap.
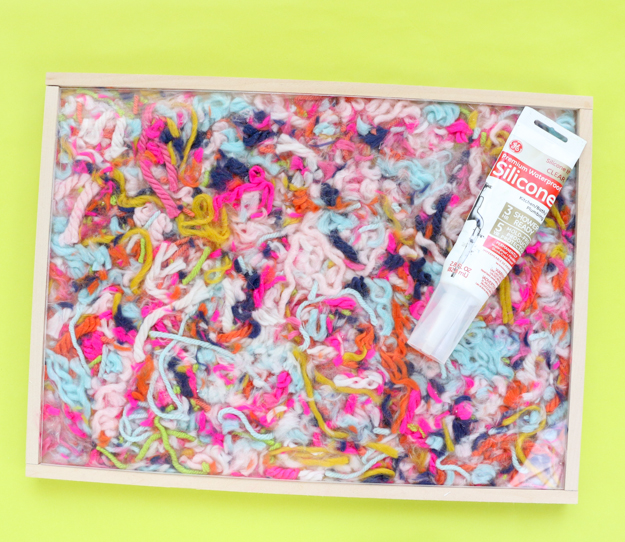
Spread your yarn out in the wood tray. Feel free to glue it in if you want, but I didn’t find that to be necessary. Then place your acrylic plexiglass piece on top and use your silicone sealant around the edges of the tray where the plexiglass meets the wood dowels to secure the plexiglass in place.

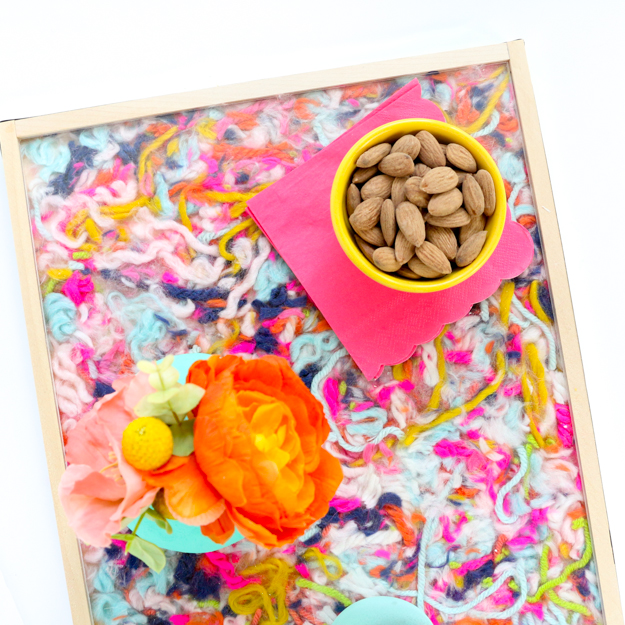
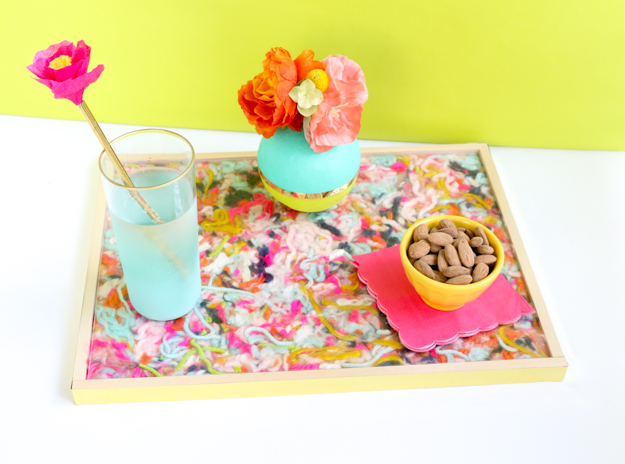
Once the silicone sealant has cured, you are ready to use your new colorful tray to serve drinks or snacks or just use as a fun coffee table tray.
I left my wood raw because I liked they way it looked against the colorful yarn, but feel free to use acrylic craft paint to paint the wood tray before placing your yarn in it for an extra pop of color.
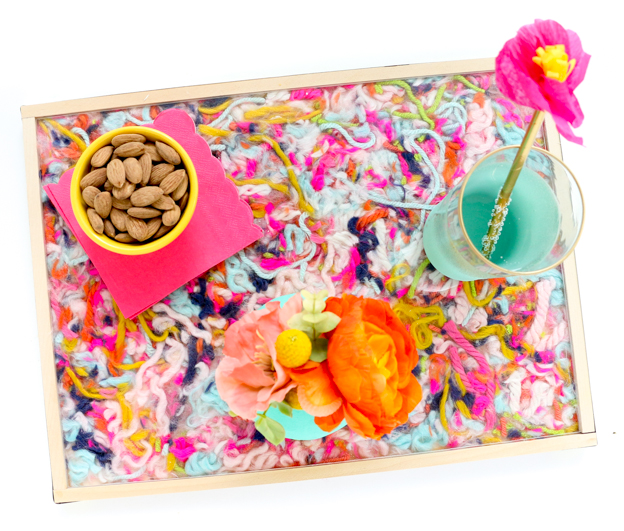
I love my funky new tray and definitely think it was a good idea to hoard those yarn scraps! Don’t you agree?


