


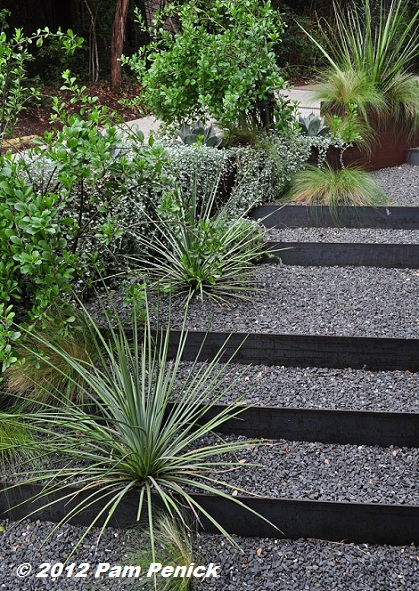
If you remember in this post I mentioned that we were planning on using some large sawn limestone pavers to create the path and then we were going to add the black basalt stone around the limestone pavers. Well, we kept running into the issue of the pavers weighing close to 220 pounds each and that the company that sold the pavers, wouldn’t deliver them because the broke to easy. That meant we would need to borrow my brother-in-laws truck and rent a trailer just to get the pavers to our house. Then came the task of trying to carry and lay them on a sloped incline. After putting off the final piece of our landscaping plans for a few weeks, I ran across this image that I had saved several months ago.
After seeing this, we figured it would be much simpler and cheaper to just use some more pieces of landscape edging and the remaining black basalt stones we already had to create steps up the hill. So, we purchased 12 more 8′ by 4″ long brown landscape edging pieces and some more blue painters tarp and stakes and got to work. We started at the bottom of the path near the sidewalk. First we laid the blue tarp and staked it down, then we dumped a pile of rocks and spread them out tapering them as they went up the hill to create a flat “tread” for the first step.
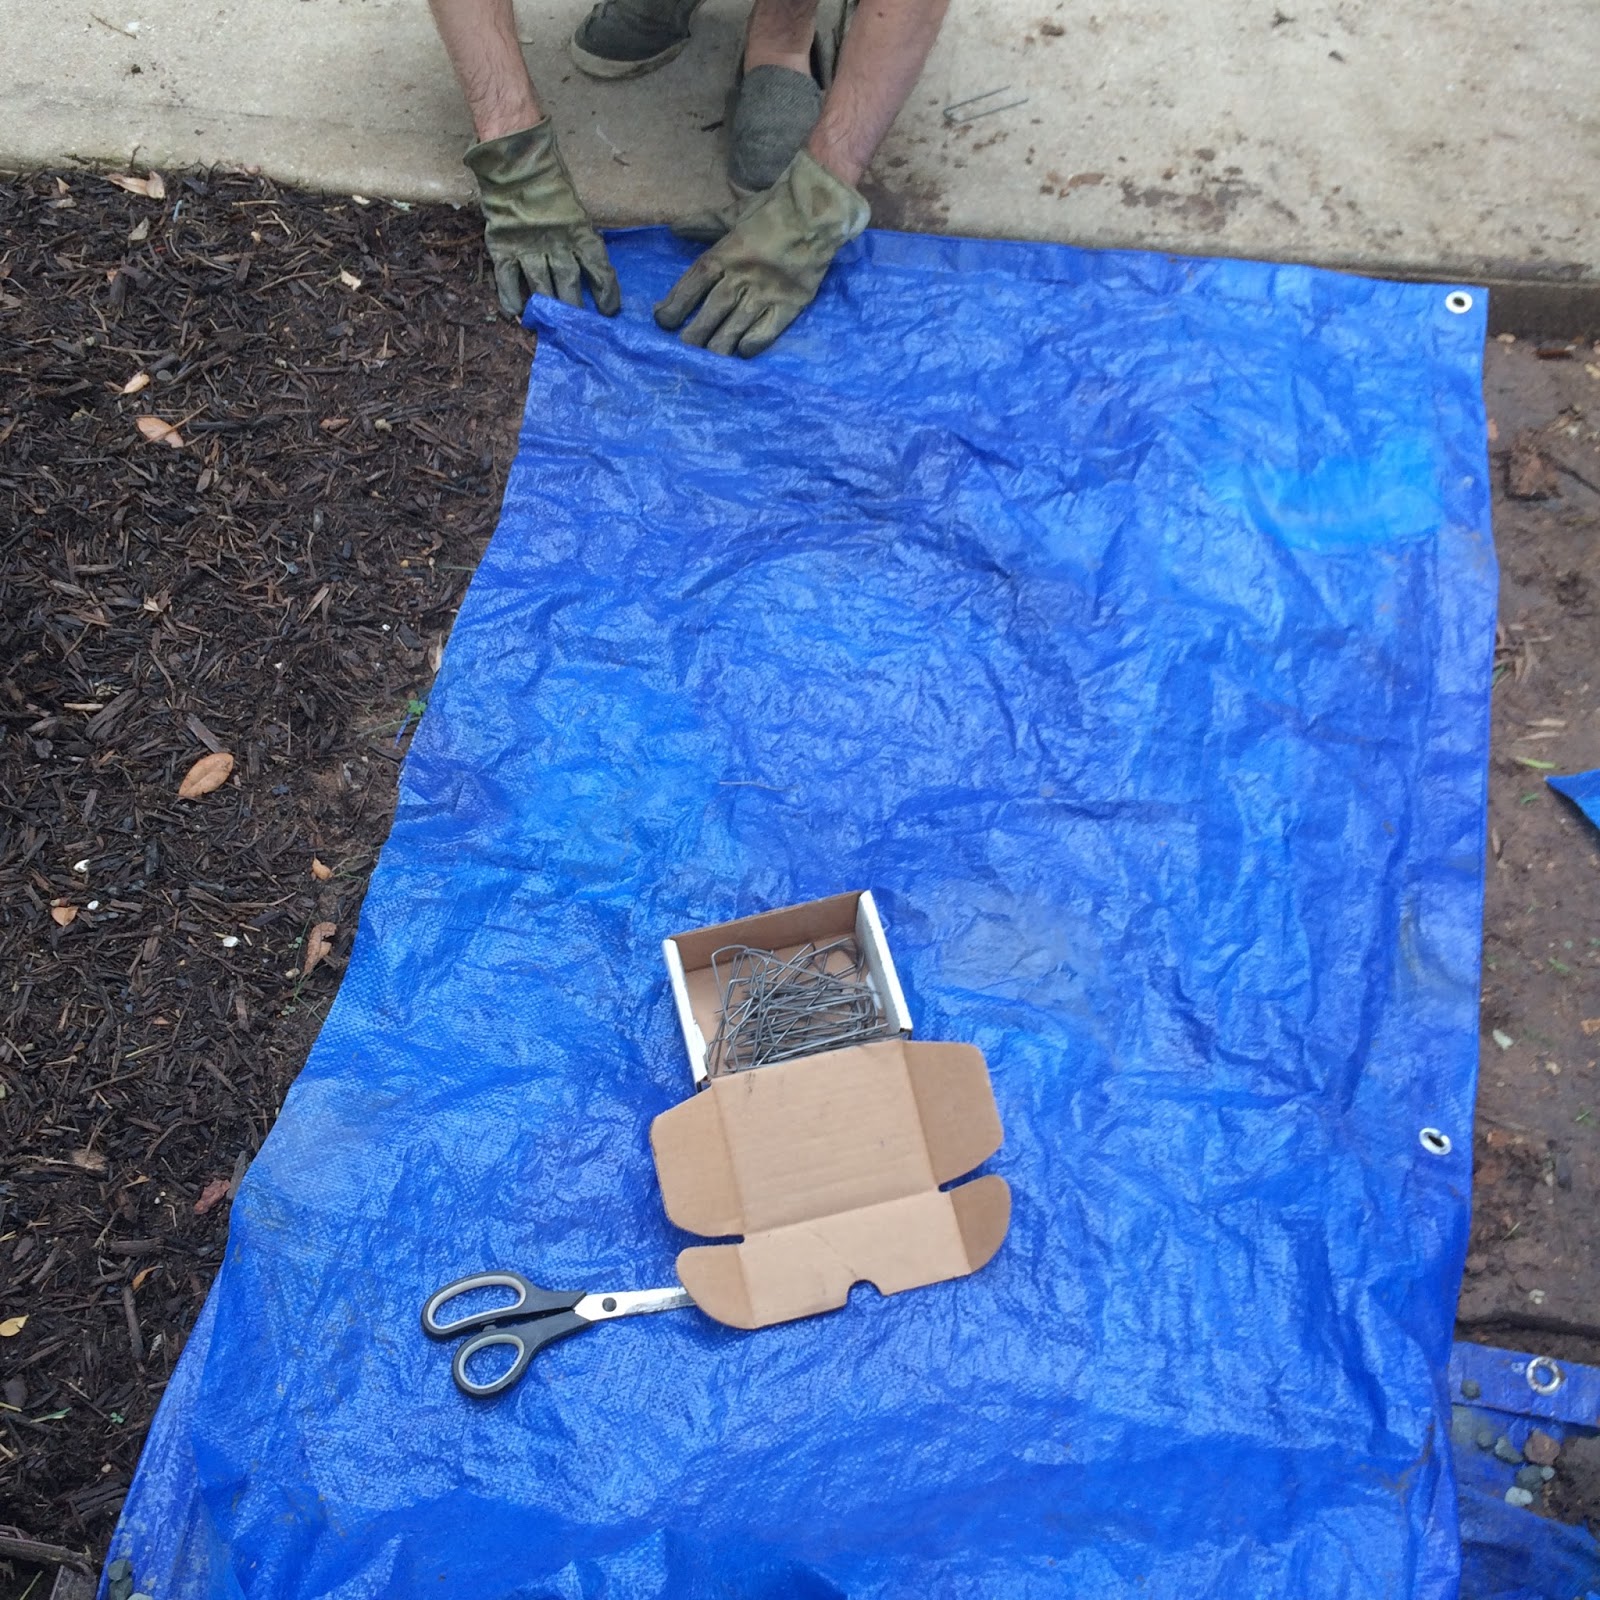


We then measured the first edging piece and bent the ends in to fit in between the side edging we had already installed. Then staked it into place.

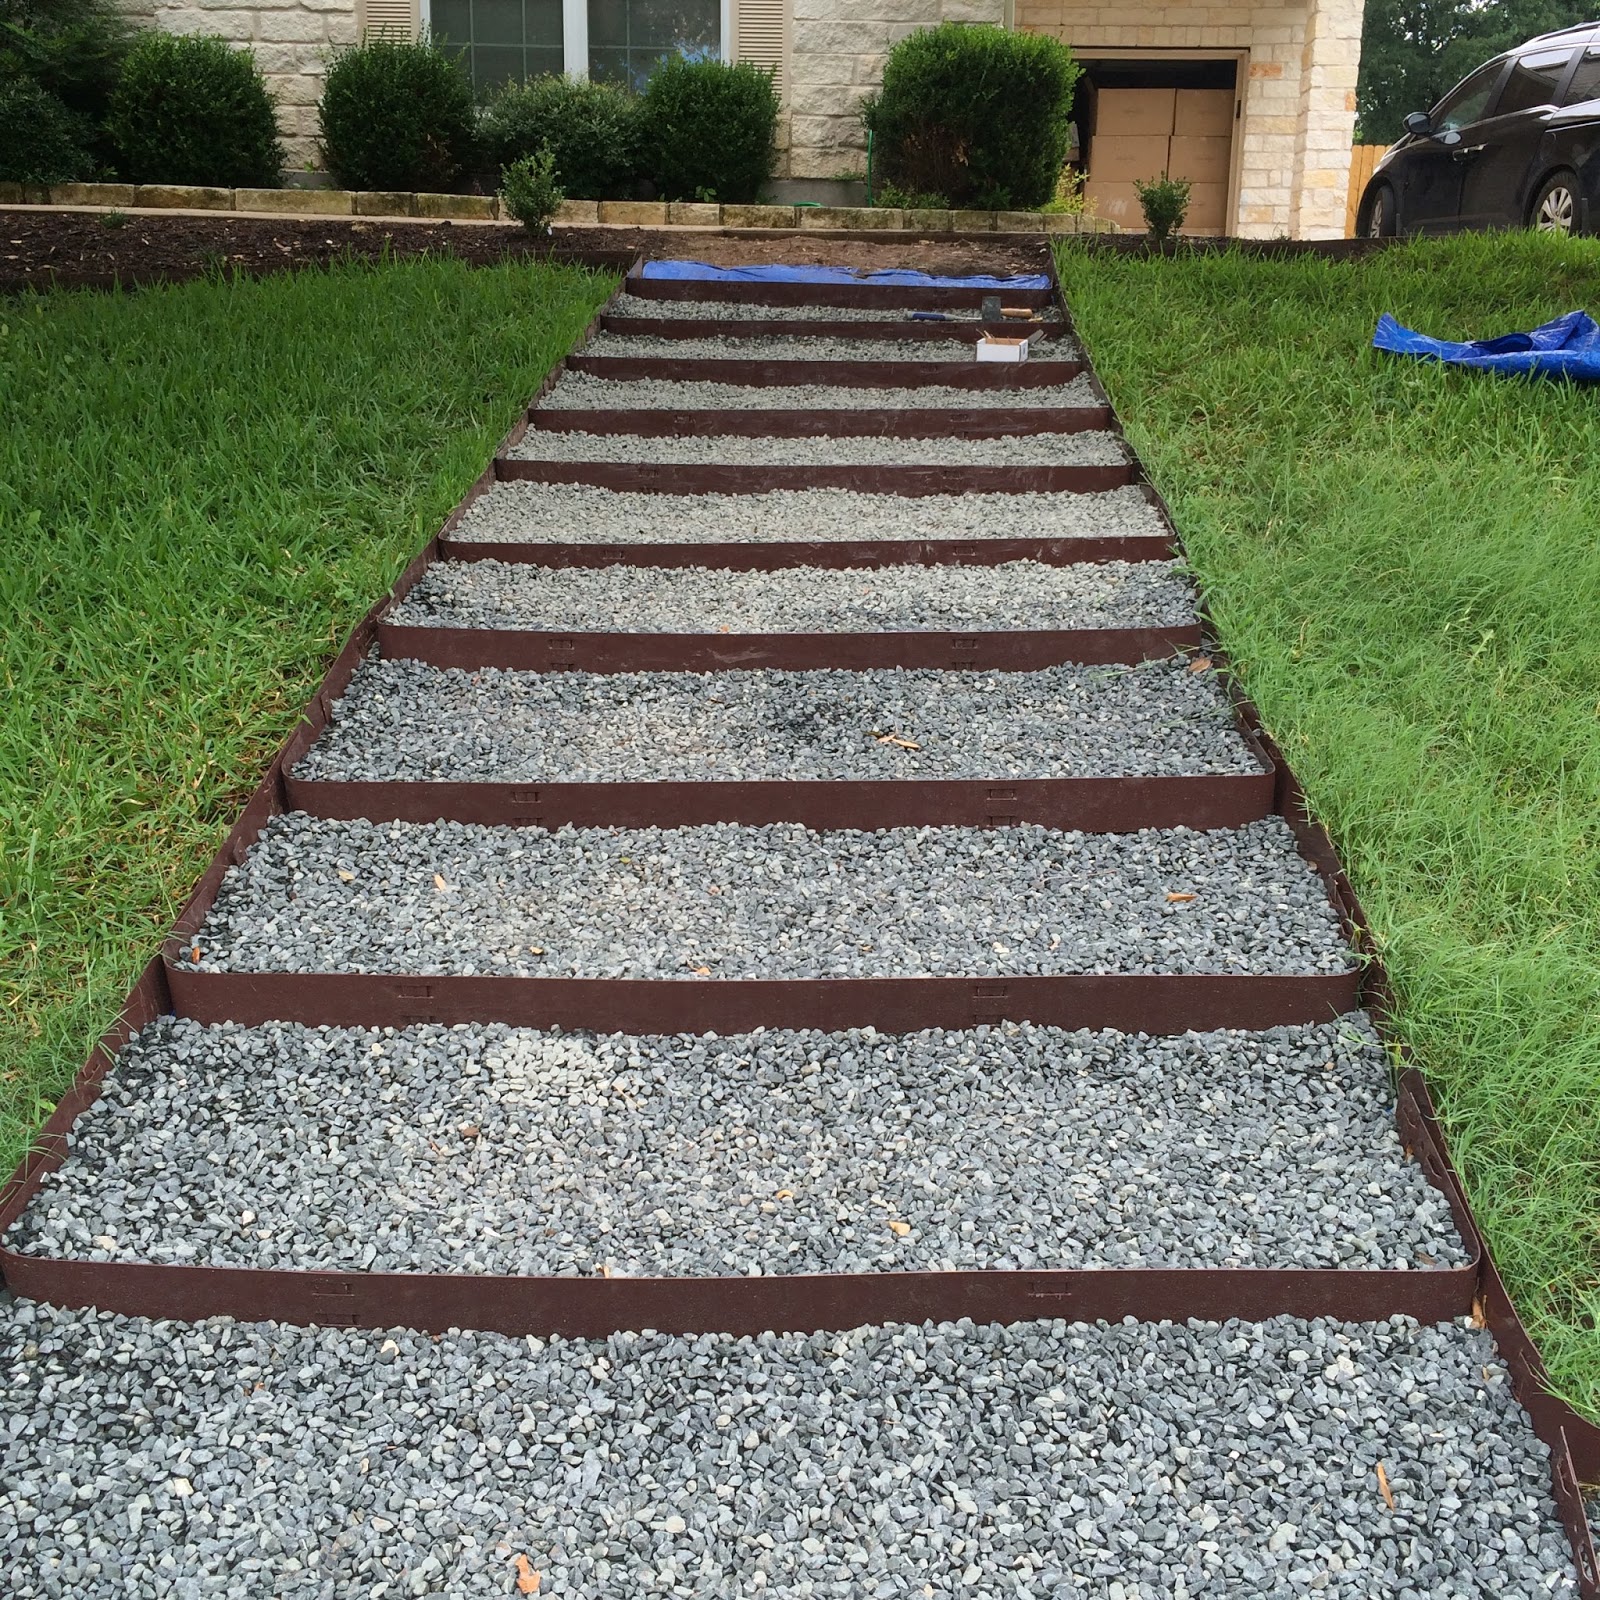
We then continued up the path adding rocks, spreading them out, and then adding another piece of edging. It was actually quite a smooth process, albeit sweat inducing.
Now we have a nice set of stairs for our friends and family to use to get up to our house, and it was so much cheaper than concrete or paver steps. We will see how they hold up to long term use, but for now they feel solid and easy to climb.
Now for a project cost breakdown.
We had a 29′ by 68″ pathway that we filled.
12 landscape (8′ by 4″) edging pieces @9.98 each = 119.76
2 cubic yards of Black Basalt stone @ $90 each = $180
stakes and tarps = $52
Total cost for the stairs = $351.76 plus tax
So really not that bad seeing as how we were quoted around 2-3K for concrete stairs. I am glad to finally call the front yard done for now. Especially since the heat of summer is setting in. Next year however, I may add some planting beds up and down the sides of the stairs to add some more native plants and give the space some more texture and color like the inspiration image above.
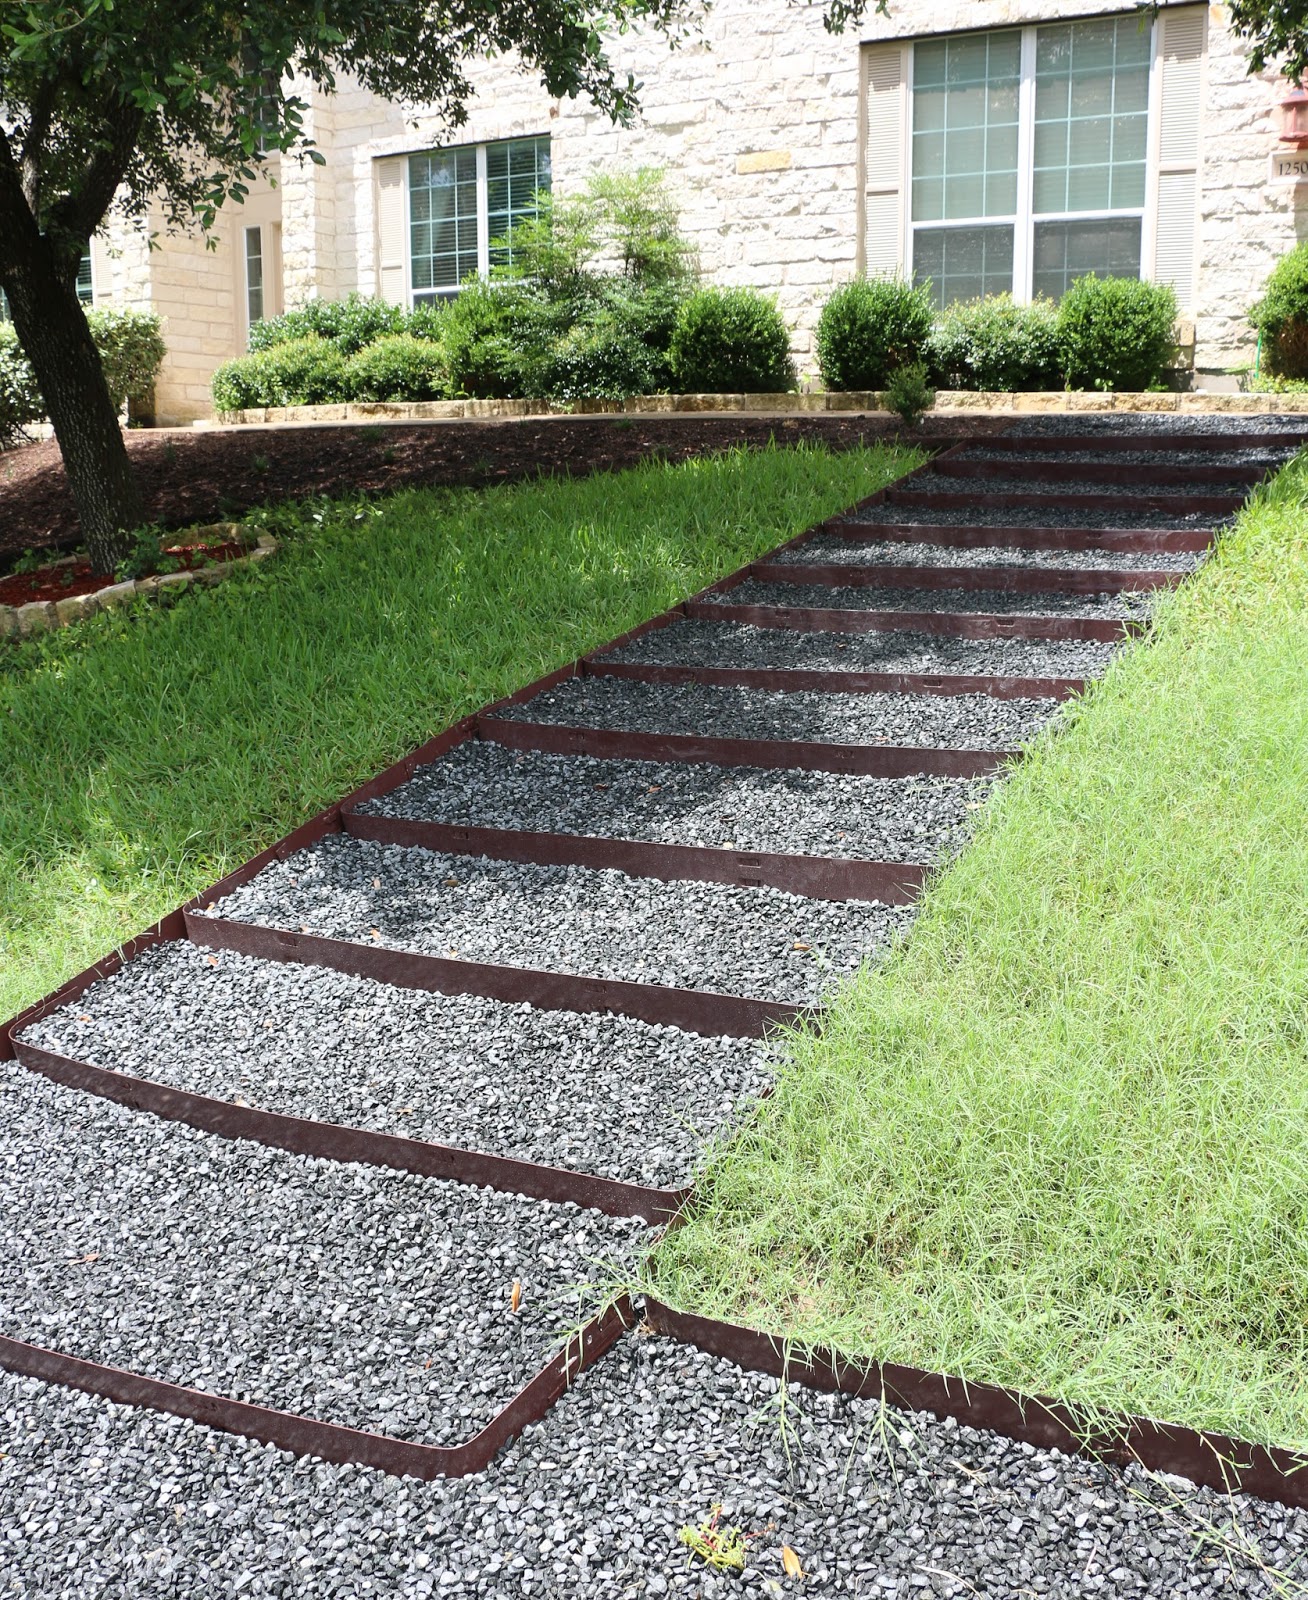
P.S. Please ignore the long unmowed grass. We are trying to let the grass grown and spread into the bare spots, so we have just been letting it grow untamed aside from the occasional weed eater treatment.


