


If you follow me in Instagram (and if you don’t, you really should, @kailochic), you may have seen that I was playing around with polymer clay yesterday. Yes, I am sharing with you yet another fun thing to do with clay. But this time it is of the oven baked variety.

I used the technique I learned from the marbled clay jewelry dish tutorial from A Beautiful Mess, to create this gorgeous marbled clay clock.
To make the clock, you will need polymer clay in black, white, and two colors of your choice as well as a clock kit. I picked mine up at Joann fabric and craft store, but I am sure any of the big chain craft stores carry them.


Then just follow the pics to create your marbled clock face. If you need detailed instructions to create the marbled clay, I suggest you look at my post here where I marbled fondant in the same method.
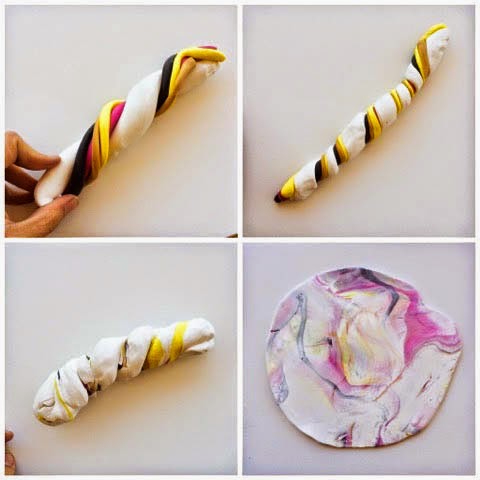
Once you have your marbled clay rolled out (I recommend a thickness of 1/4-1/3″), you will need to cut it into a circle. I used a plate and an X-acto knife to create mine. Then cut a small circle out of the center for the clock pieces to fit through. Now it is time to bake your clock face according to the directions on the clay you used. I baked mine at 275 F for 15 minutes.
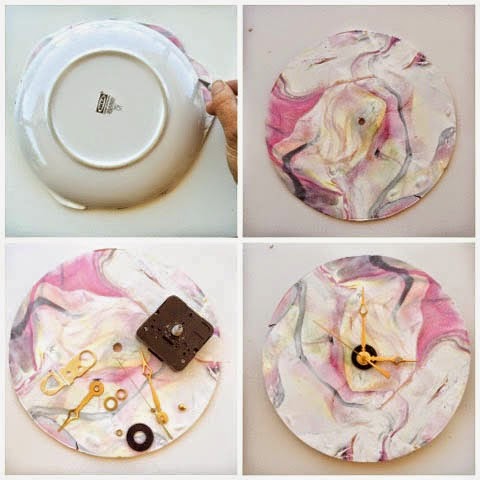
Once baked and hard, assemble your clock according to the package directions. And if desired you can use some gold paint or a gold leafing pen to add some details or paint the edge to make it clean and pretty.
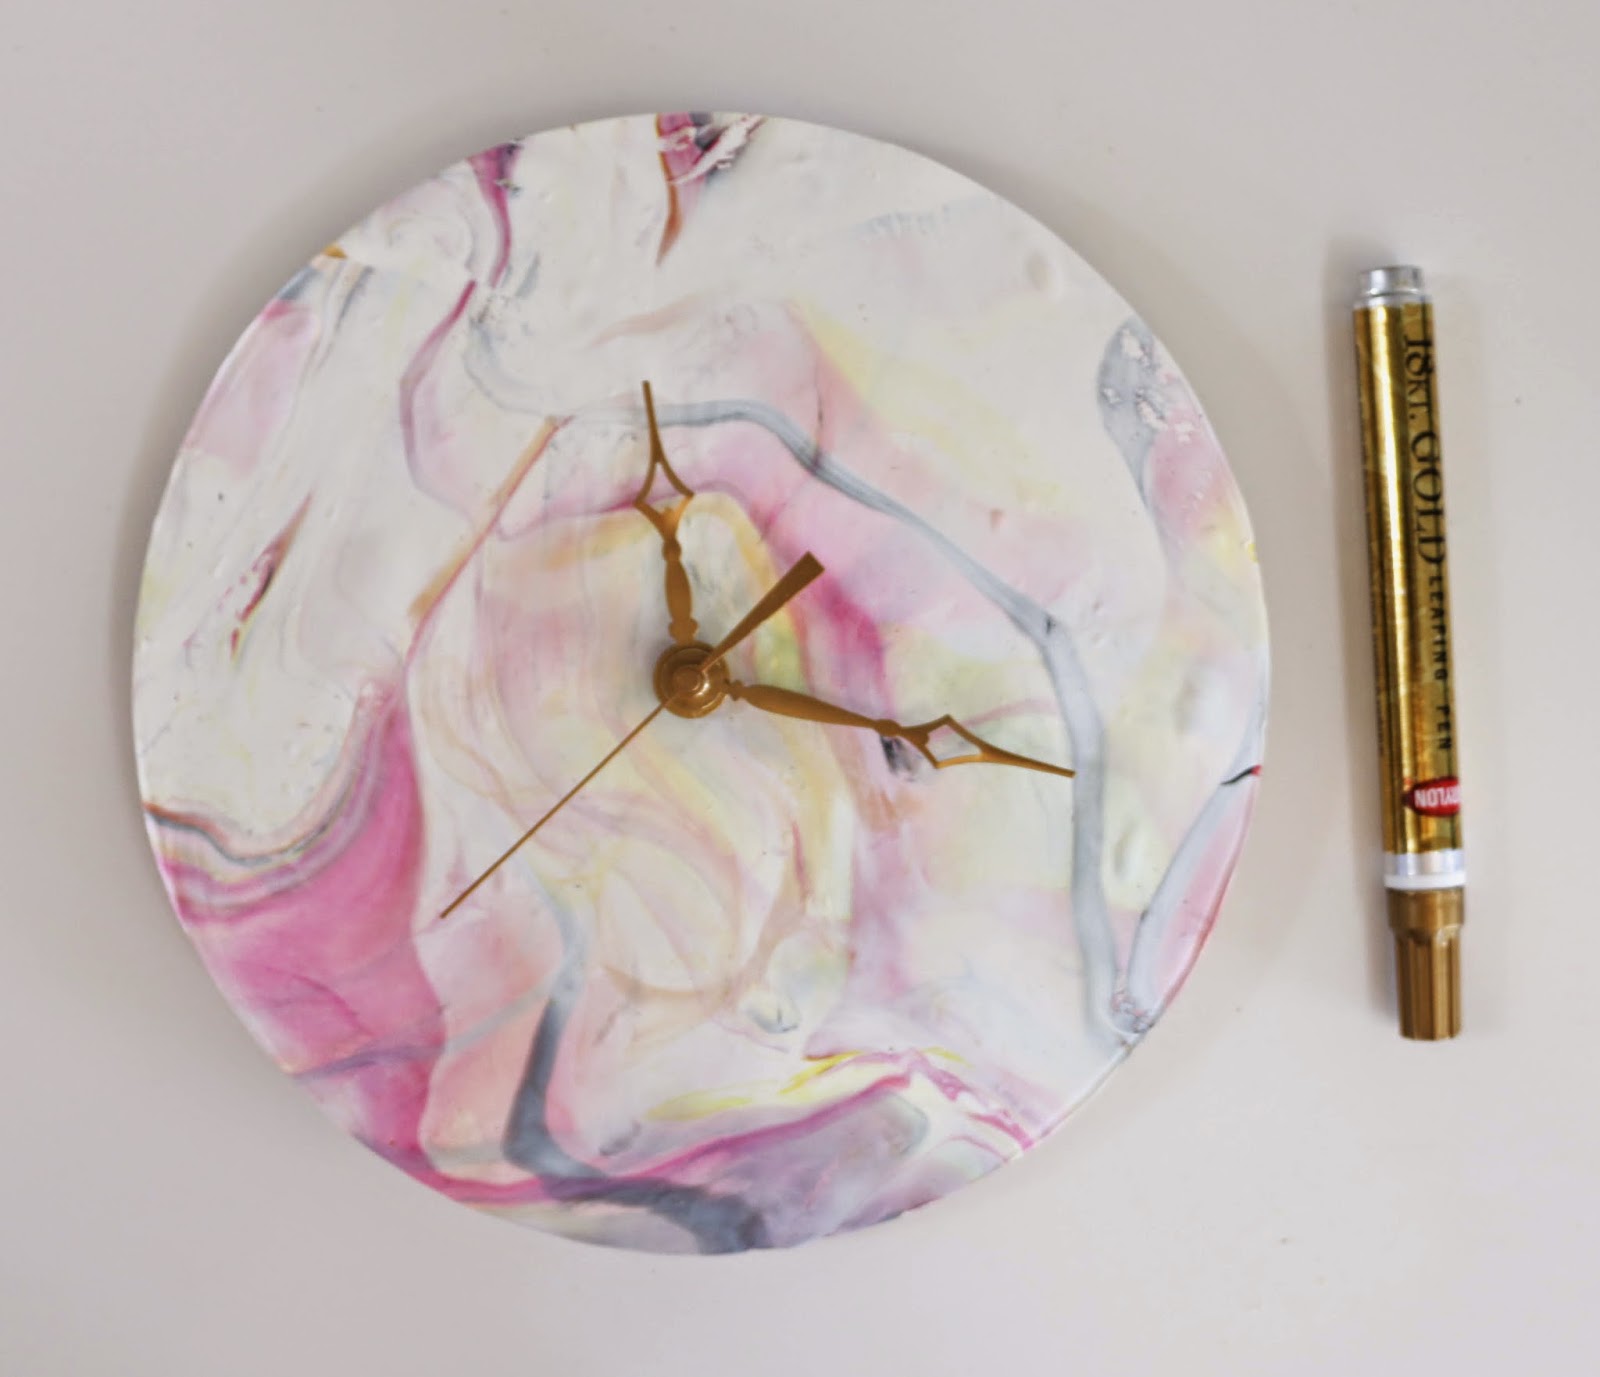
Now, just add your clock battery hang and enjoy your new piece of time art.


