


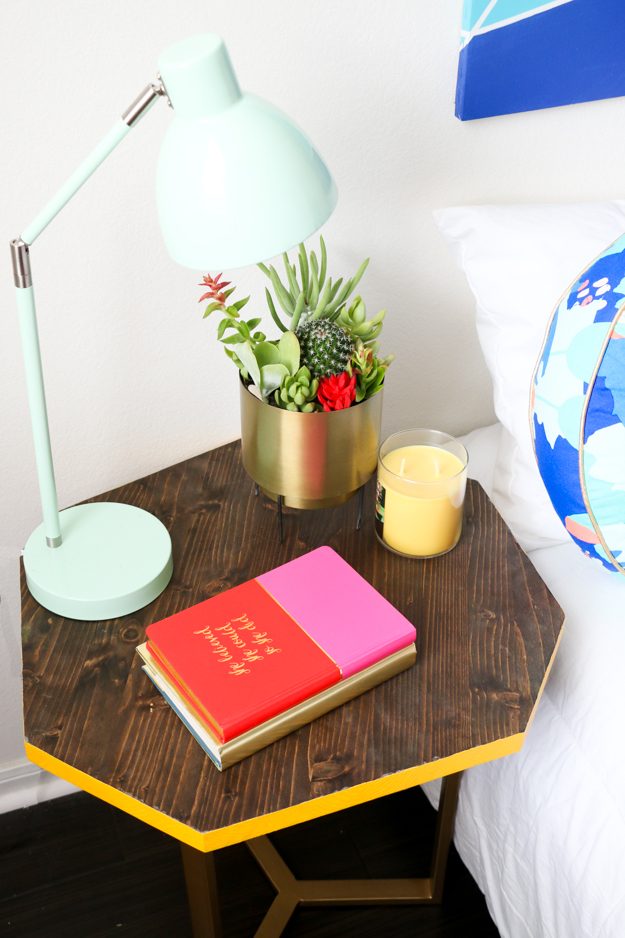
Looking for a unique side table or night stand for your
home? Sure you could go out and buy one, but why not DIY one instead? That’s usually my motto anyway. By DIYing one, you will
end up with a unique one of a kind piece and it is easier than you think to
make your own. This asymmetric side table is so unique in both the cut and the pop of color on the edge, and all it takes is a few cuts, some stain, and a bit of paint to make.

The Supplies:

- 36″ raw wood round (you can find these at most home improvement stores)
- Wood stain in dark walnut
- Acrylic or latex paint in your choice of color (for the edge)
- Water Based Poly Acrylic
- Paint Brush
- Pencil and Ruler
- Circular Saw
- Pipe brackets and old table base (or table legs of your choice such as hairpin or tapered)
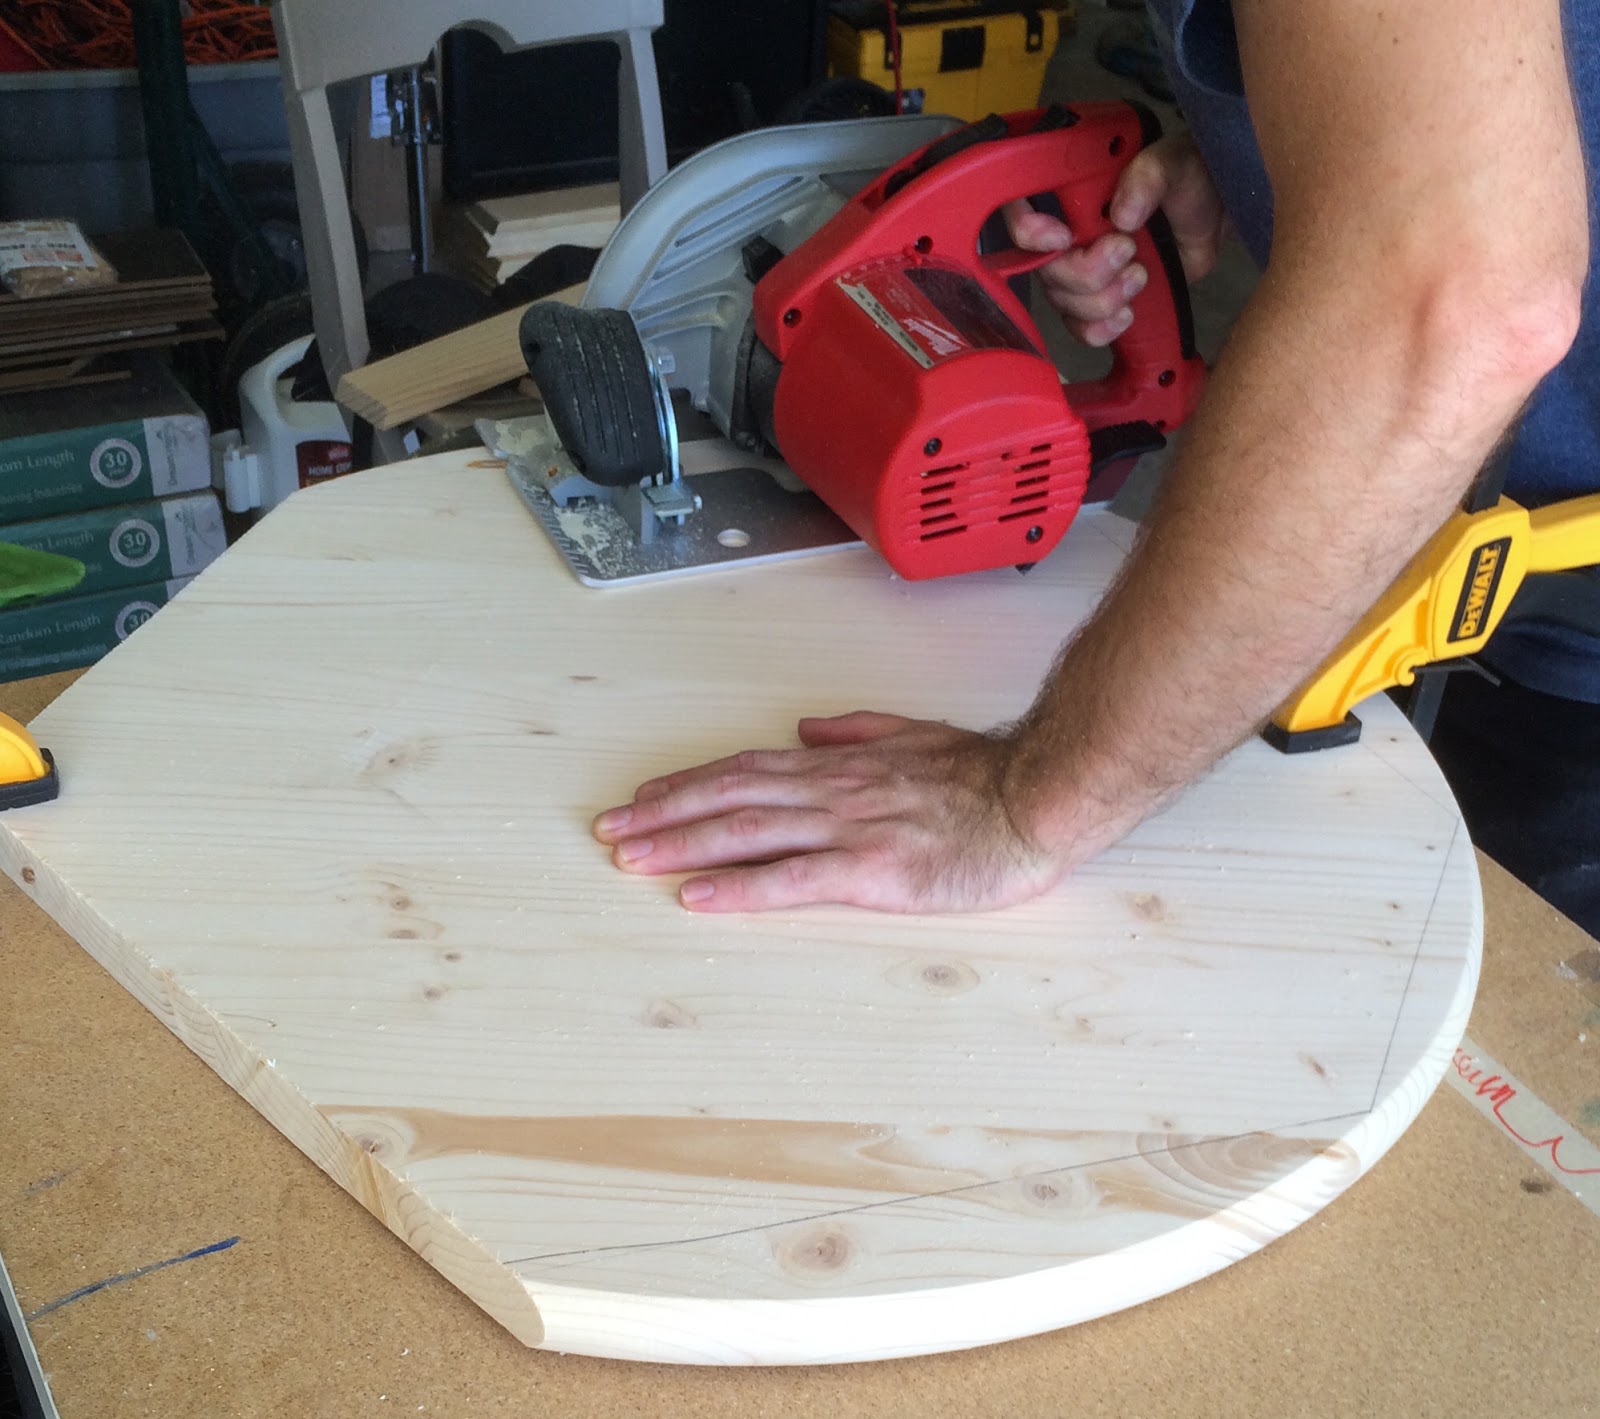
To begin you will need to cut down your wood round into an
abstract geometric shape. To do this use a pencil and ruler to trace lines on
the edge of the wood at various angles and lengths. We ended up with 8 edges
when we did this, but the shape is by no means a perfect octagon. Go with you
eye and make the lines asymmetric and interesting to you. Once you have your
edges traced out, you will need to clamp your piece of wood to your work bench
and use a circular saw to cut the edges along your lines. If you don’t have
access to power tools, no problem! Either find a friend that can help, or take
your slab back to the home improvement store and have them cut it for you. The
cuts won’t be exact, but they don’t have to be. That is the beauty of this
project!

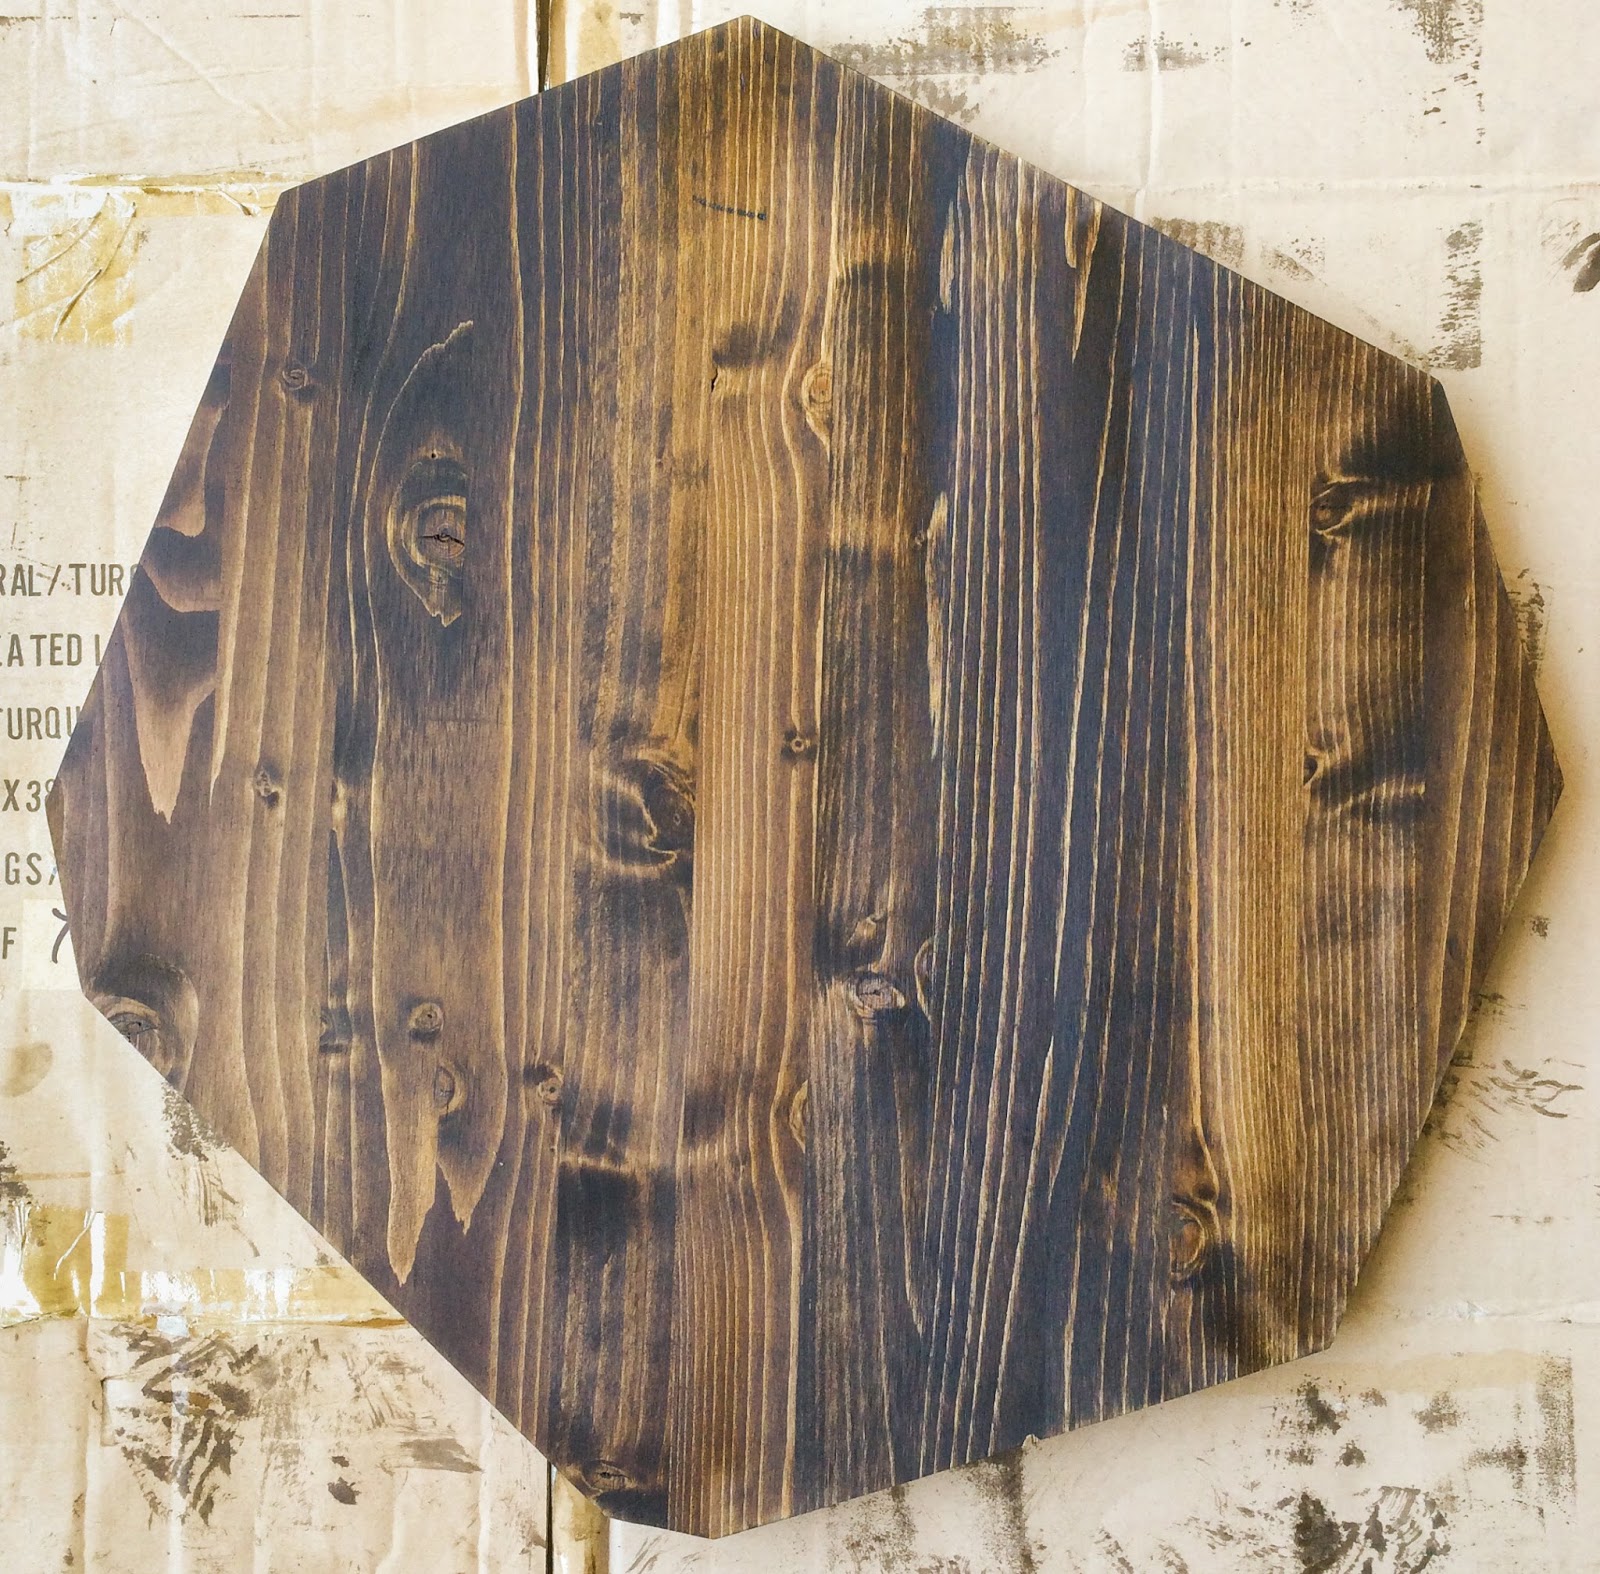
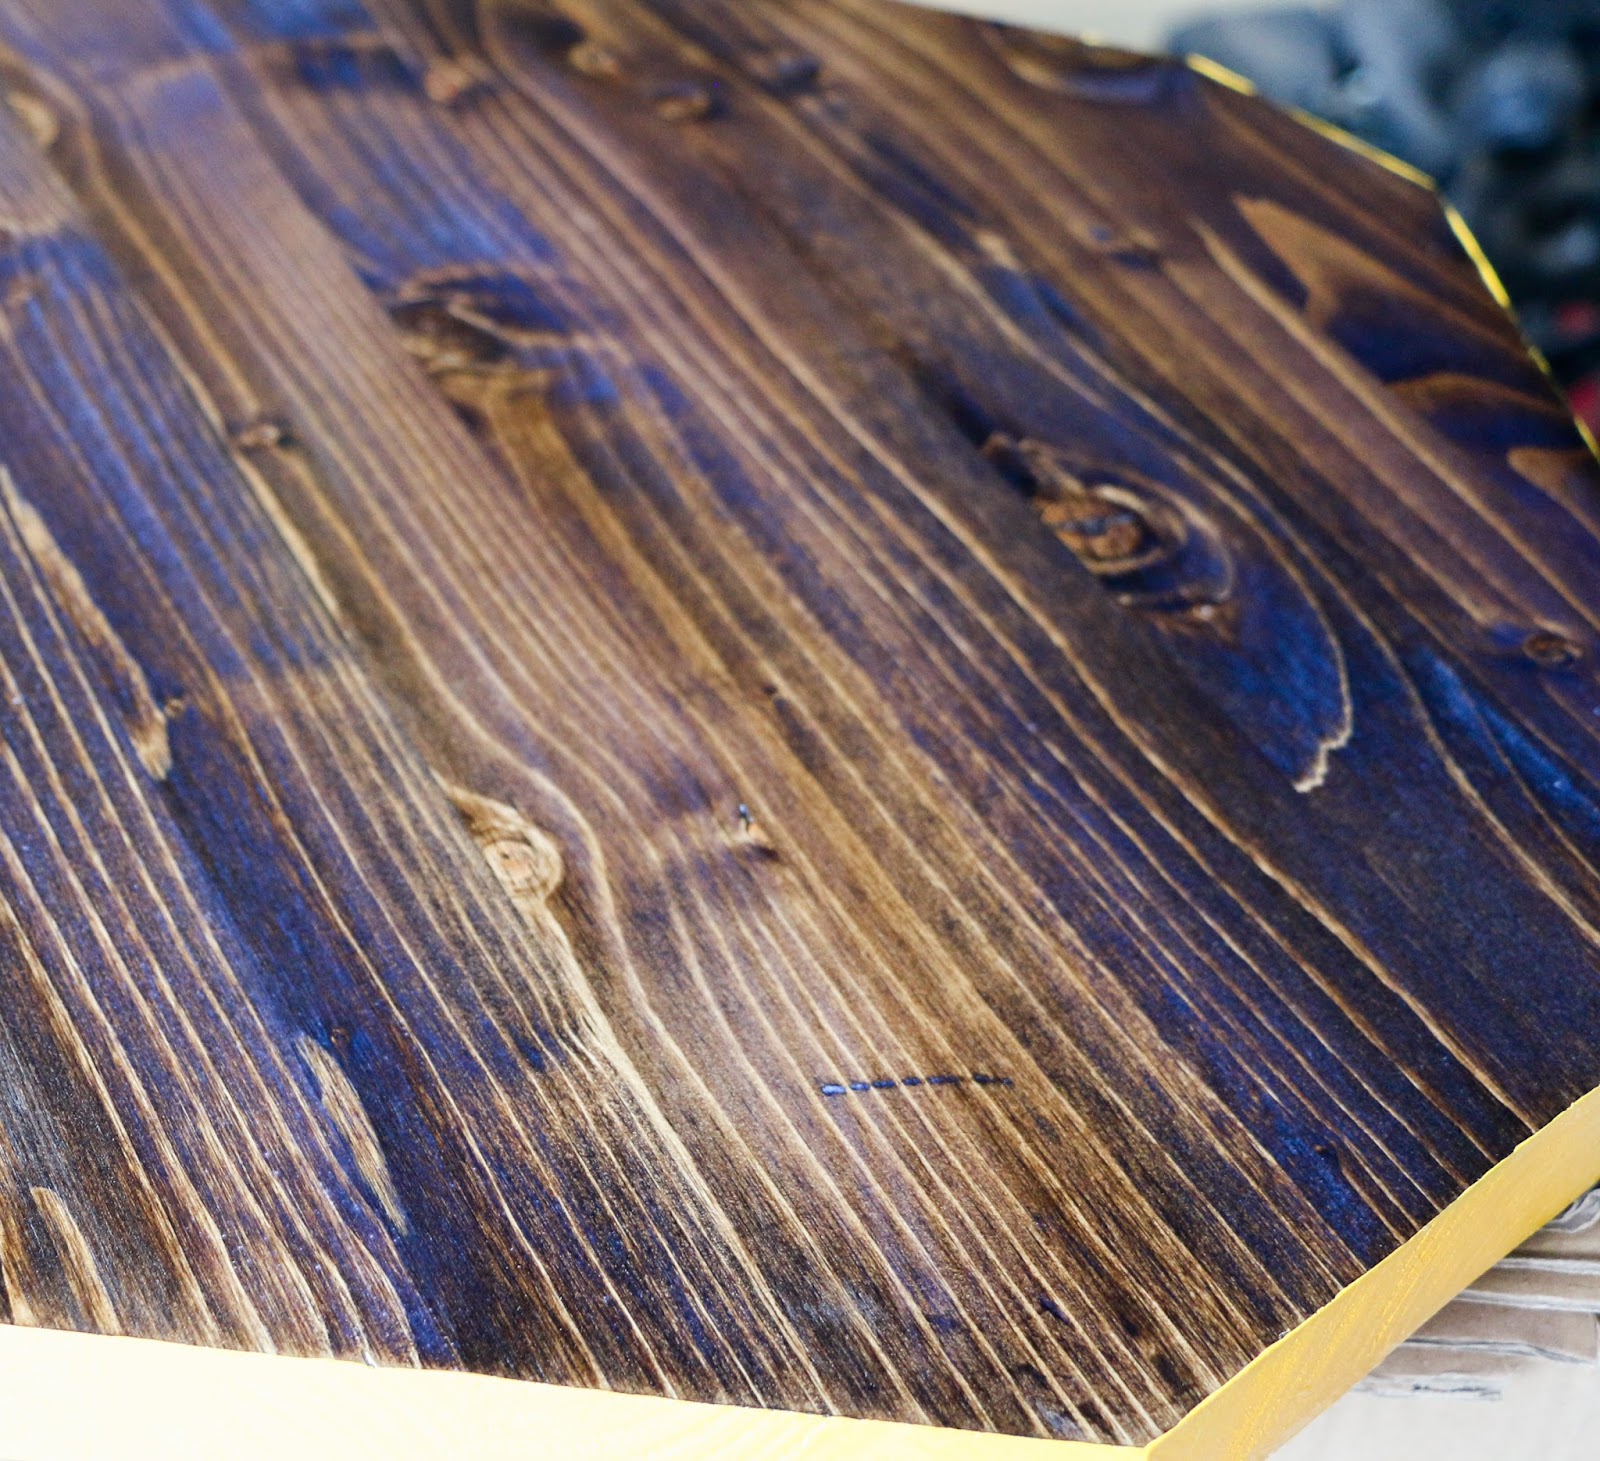
Once your piece of wood has been cut into shape, it is time
to stain it. I went with Minwax stain in dark walnut. First I prepped my wood
by making sure it was clean and free of dust, then I used a piece of old
kitchen tea towel to stain the wood on the top and bottom only according to the
stain can. I used two coats to get a nice dark walnut color. Now it is time to
let your piece of wood dry over night.
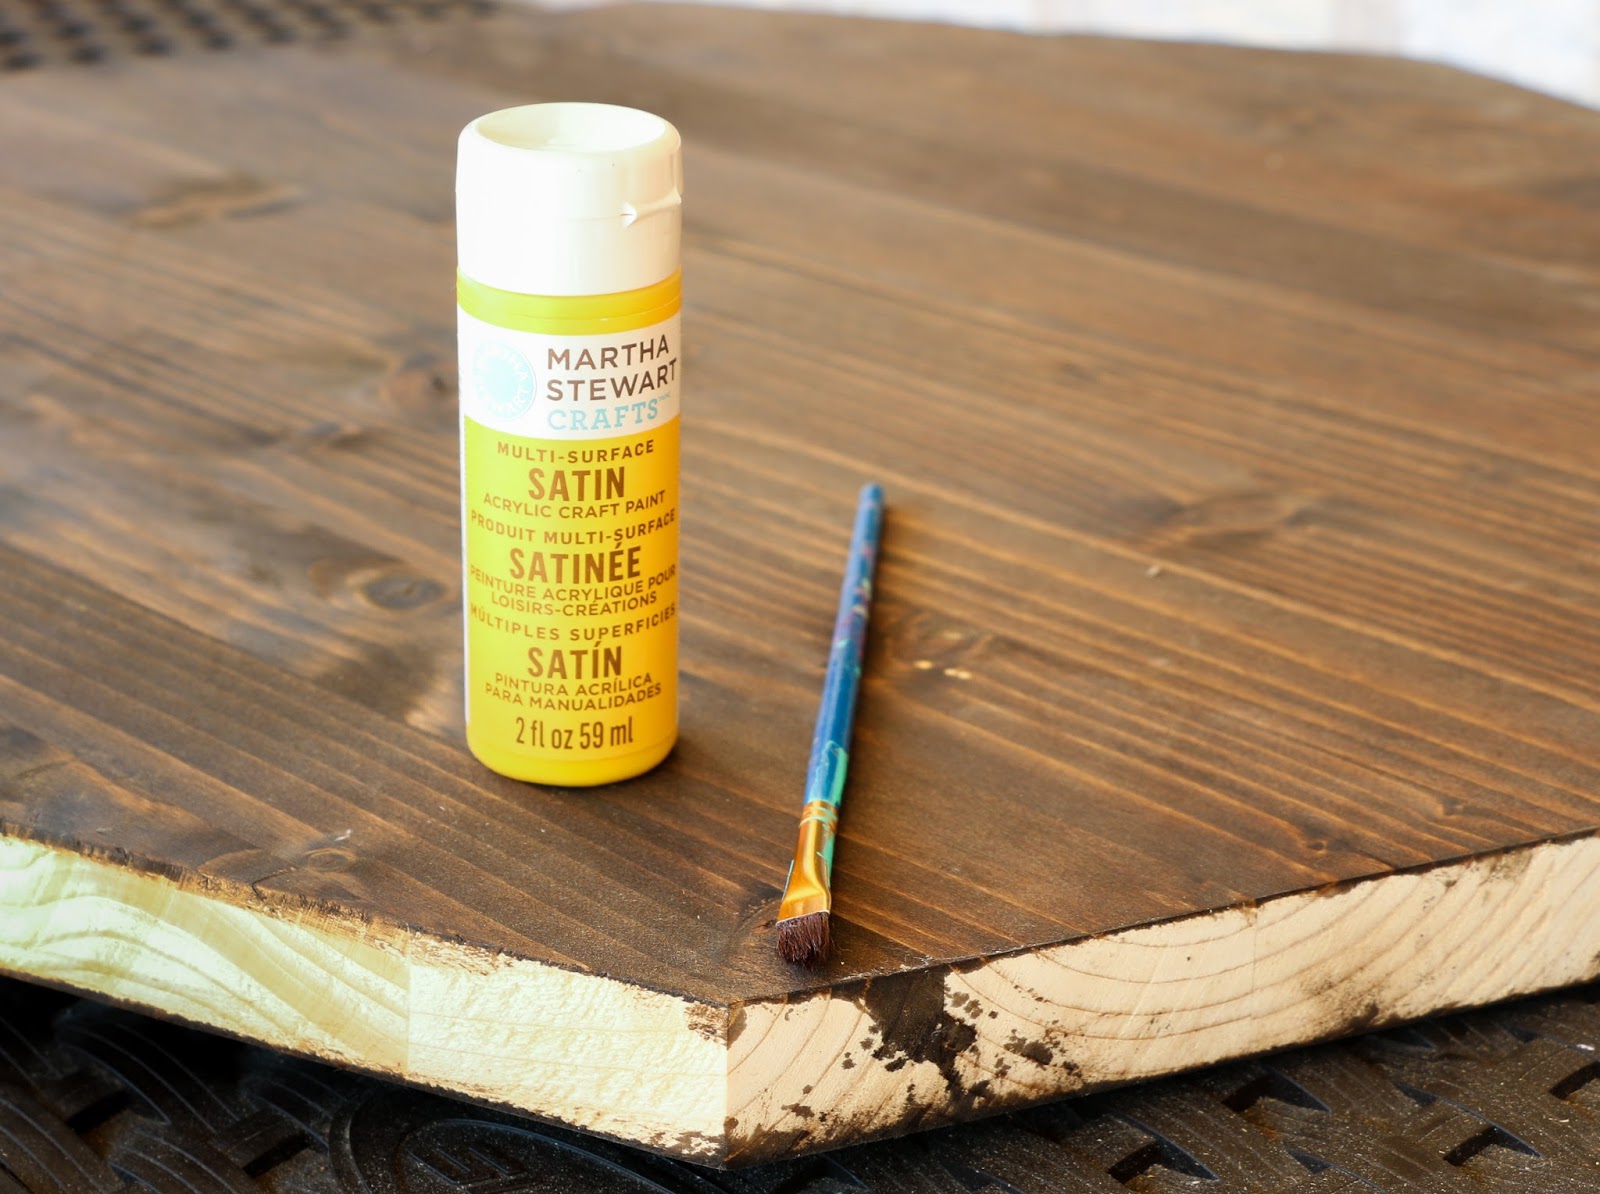
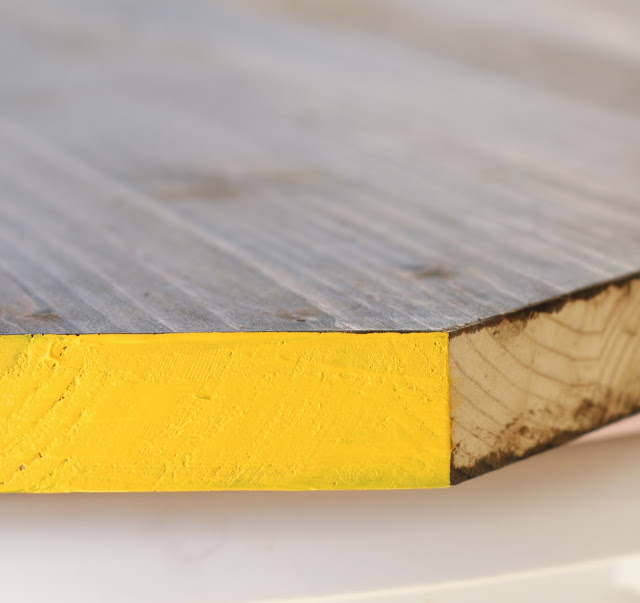
Now that the stain has had time to soak in, you will want to
paint the edges. Any latex based paint will work for this part, but I ended up
using acrylic craft paint in yellow instead. Just choose the color you like
best and paint the edges of the table top. If you don’t have a steady hand,
feel free to tape off the top and bottom while painting the edge, but I just
freehanded it.

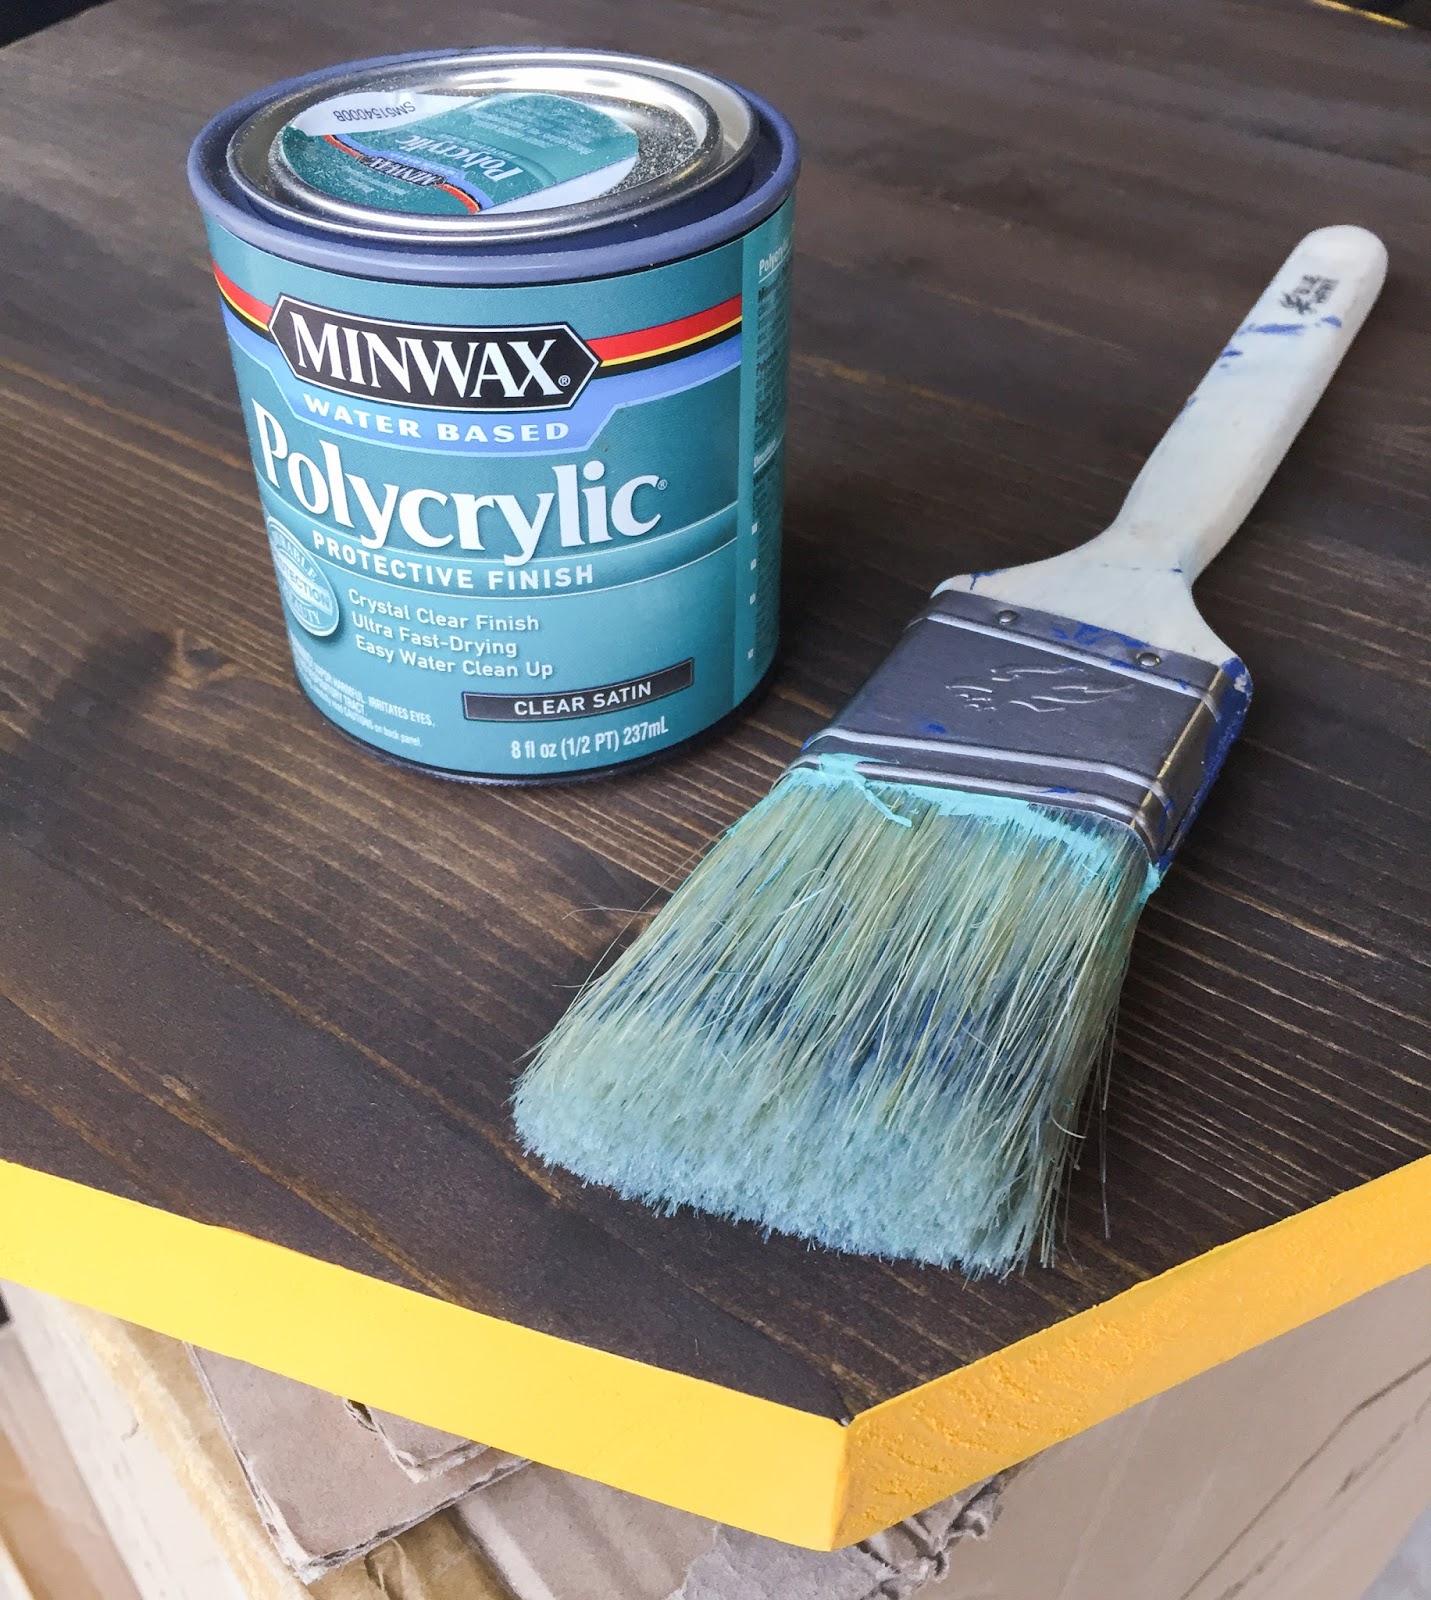
Once you have your table top stained and painted, it is time
to seal it. I went with satin sheen poly acrylic. It is water based so it cleans
up easily which I like and it is not full of VOC’s. Using an nice angled paint
brush (I am partial to the small rubber handled Wooster or Blue Hawk brushes), coat the top
and sides of the table with the poly acrylic. Let dry 30 minutes and then apply a
second coat. Make sure to watch the edges for drips and brush them out if they
appear. Let sit for another 2-3 days to cure.
While the top is curing, it is time to procure your base. I
went with a table base from an old side table I had, but think outside the box.
Go thrifting for a junk table with great legs. Or how about a stool base or a
wire trashcan turned upside down? Not into repurposing? Then look online at
places like Etsy or Pretty Pegs to find new table legs that you can use
instead. If it isn’t in a color that you like, just use a can of spray paint
for an instant transformation. Digging the gold I have going on here? Use a can
of Valspar Metallic Gold Spray paint for the same look.
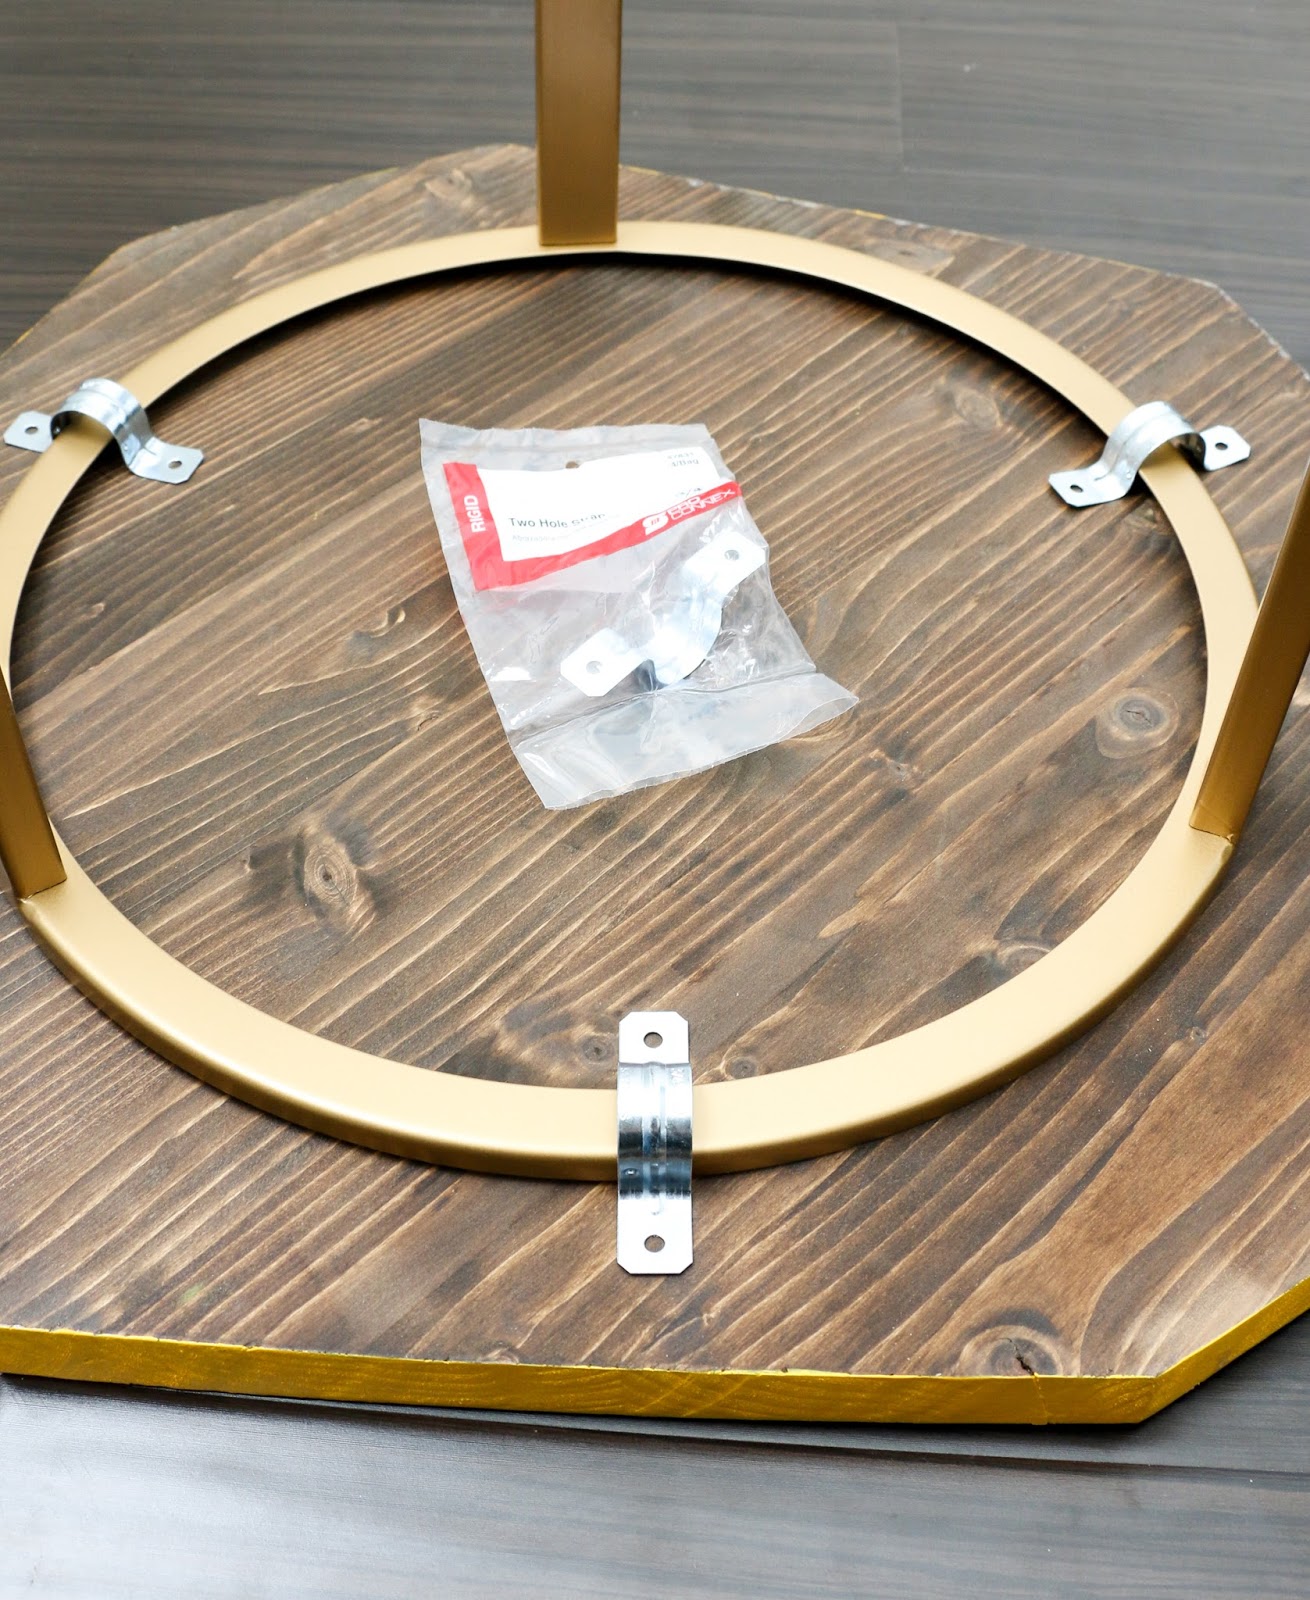
Now that you have your base and table top, it is time to
assemble your new side table. Because my table had a ring around the top that
held the old piece of glass that broke, I used two hole metal tubing clips to
attach the top to the base. I just placed them around the top and used small
screws to secure the table top. This would also work if you were using a wire
trash can (just use a smaller clip meant for smaller tubing). If your table
base already has a top (smaller than the new one), you can glue the new top on
to the old one using Gorilla Wood Glue and some clamps. Of if you found some new hair pin legs you
like instead, those can get screwed right on to the table top itself. Just be
sure to use screws small enough that they won’t poke trough the other side and
ruin the top of the table.
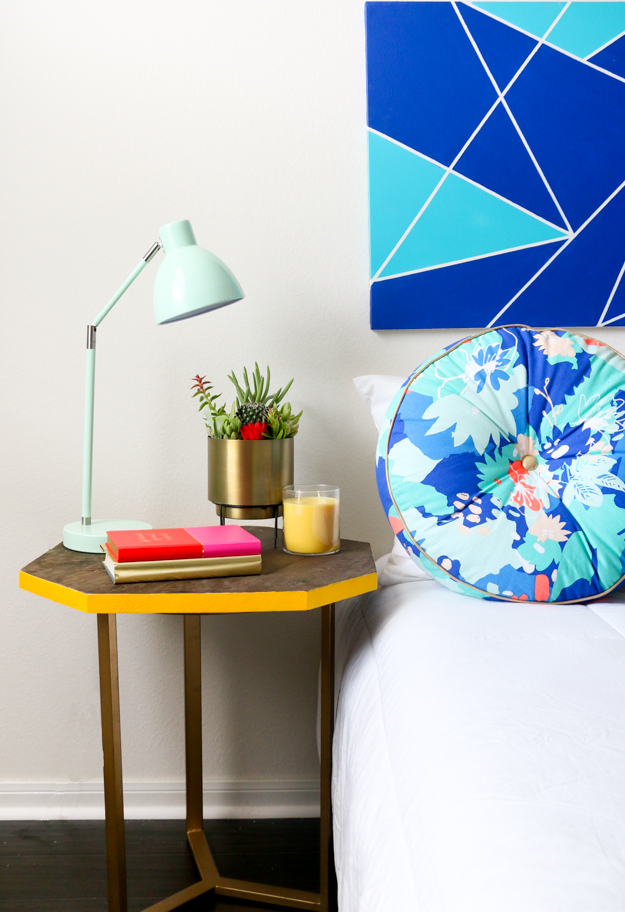
Now that your table top is secured to the base, flip it
over, add some accessories and marvel in the joy of building your very own side
table. I really love the asymmetric aspect of this table and that pop of color! What’s your favorite part?

over, add some accessories and marvel in the joy of building your very own side
table. I really love the asymmetric aspect of this table and that pop of color! What’s your favorite part?


September 6th, 2016 at 6:43 pm
Love this idea! And looks pretty easy
January 25th, 2020 at 5:55 am
[…] Download Image More @ akailochiclife.com […]