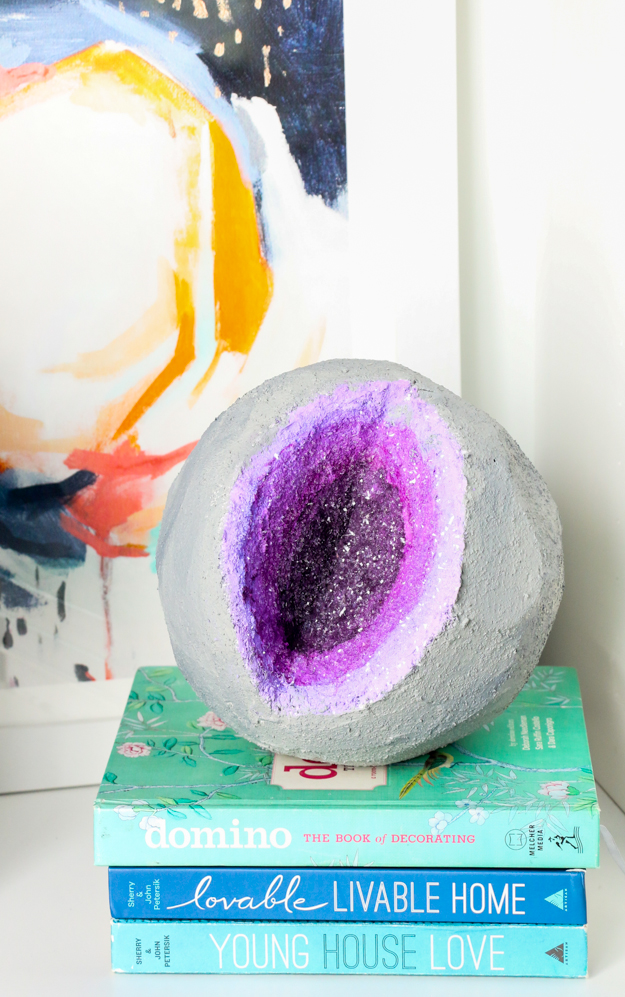
One of my daughter’s (and mine if I am being honest) favorite parts of science museums is the gems and minerals area. Especially the amethyst geodes. On our trip to Denver a few years ago, they had the largest amethyst geode that was just gorgeous! So, I decided to turn my foam ball into a pretty decent geode replica and I will share how you can create your own too.
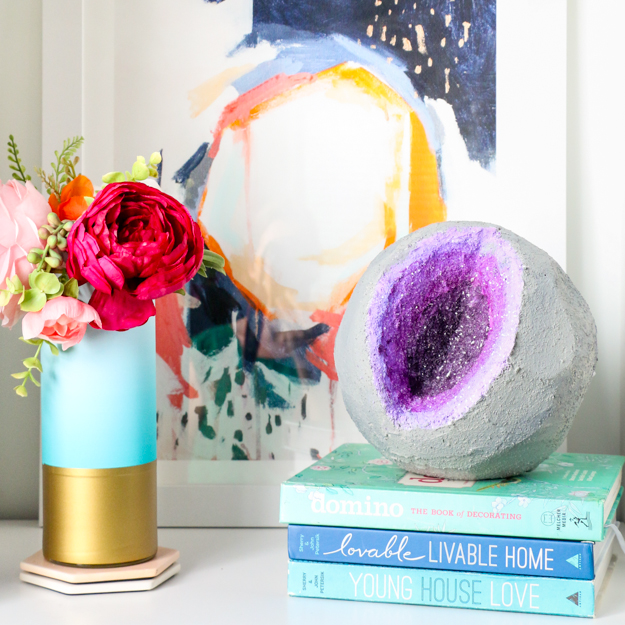
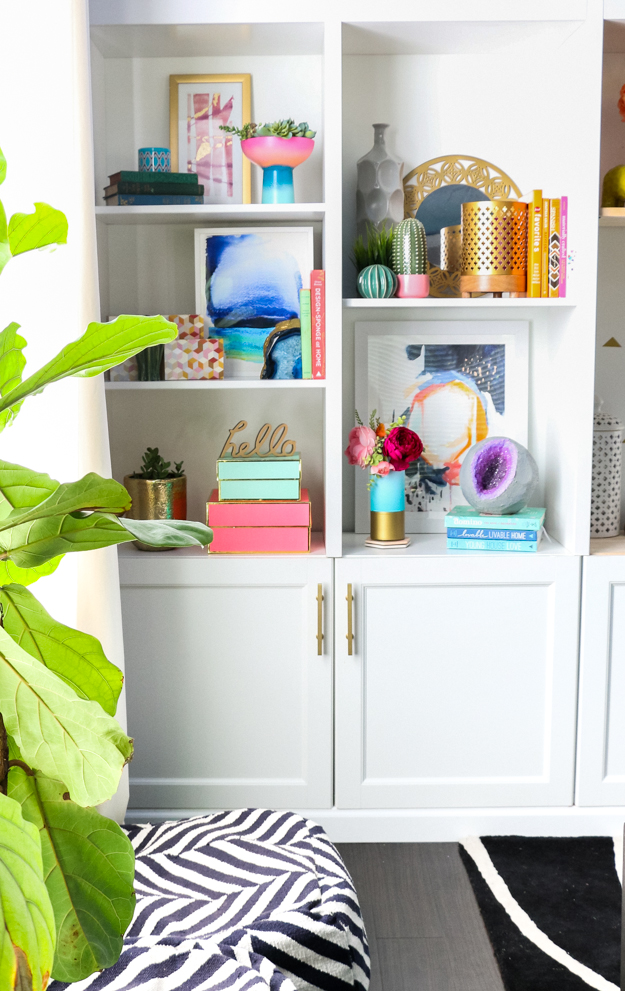
See how realistic it looks sitting on the shelf?
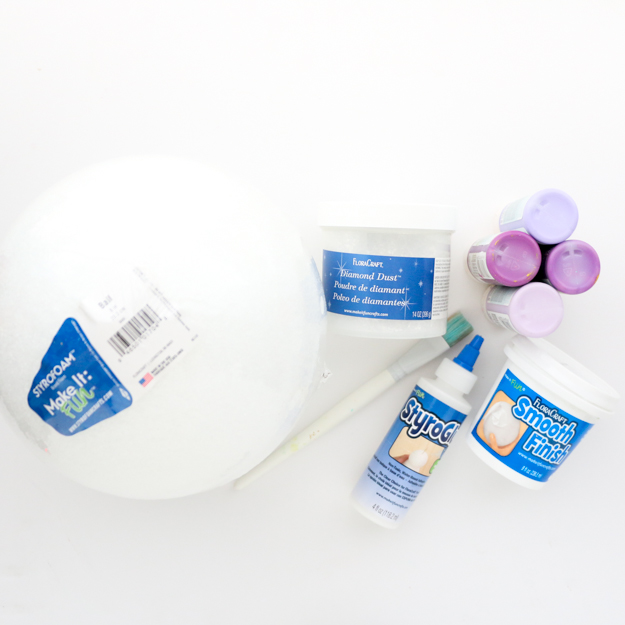
- Flora Craft® Make It: Fun® 8″ Foam Ball
- Flora Craft® Make It: Fun® Smooth Finish
- Flora Craft® Make It: Fun® Foam Knife
- Flora Craft® Make It: Fun® Diamond Dust
- Flora Craft® Make It: Fun® StyroGlue
- Several Shades of Purple Acrylic Paint
- Paint Brush
- Faux concrete paint by Folk Art
- Spatula
Begin by using the foam knife to cut a wedge sized piece out of the foam ball. You want to make it look like a piece of rock got chipped out, so there is no need to be precise. Just make sure to make the cut deep enough to get to the center of the ball. Next use the knife to slice of pieces of the ball to give it an asymmetric and realistic rock look. Once you ball is cut, use your spatula to spread on the smooth finish to coat your ball.
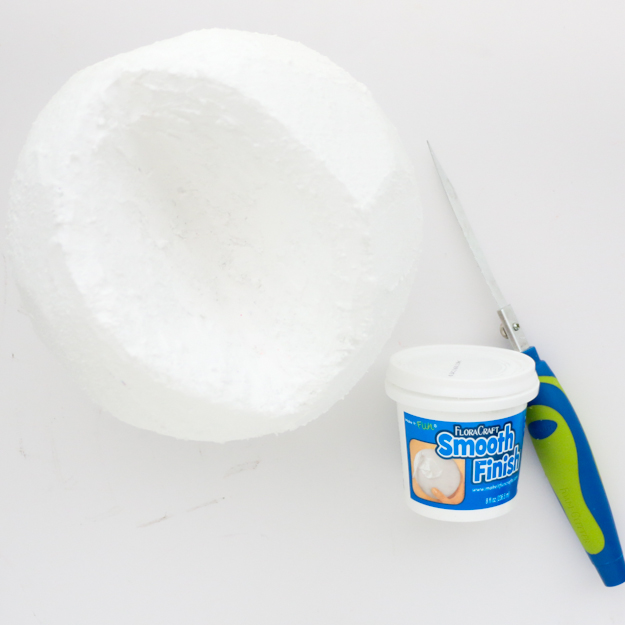
You want to add the smooth finish inside the cutout section as well as all over the outside. Let the smooth finish dry overnight. Once dry you can sand down any rough spots if needed, then its time to paint!

Use your purple paint to paint bands inside the cut out section. Starting with darkest in the middle and working your way out to a light purple gray on the outer ring. At this stage when my paint was still wet, I sprinkled in the Diamond Dust to give the faux geode that signature sparkle.
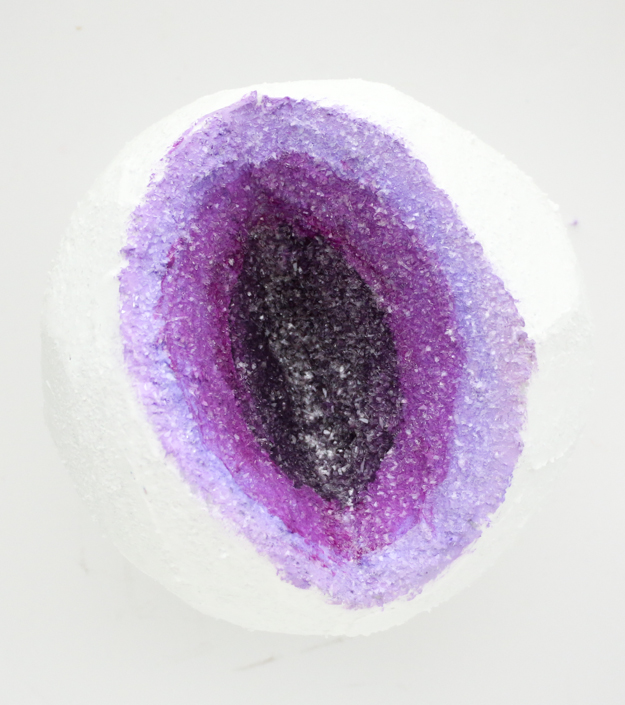
painted the outside of the geode with the two shades of concrete paint
to give the geode a realistic rock look. At this point you can add dabs of glue inside the geode and then add more Diamond Dust to create a more dimensional crystal look. Once the glue and paint is dry your geode is ready to display!